
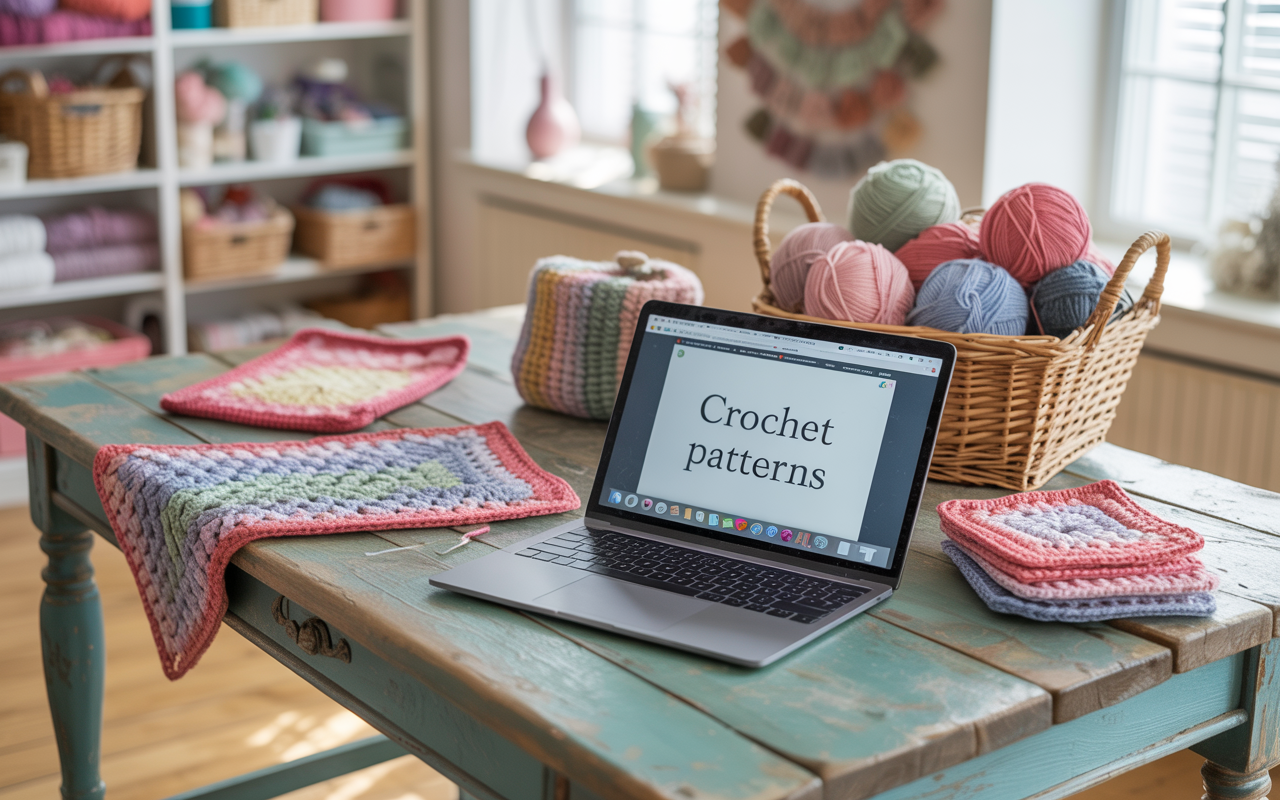
How To Simply Customise Crochet Patterns
How to Customise a Crochet Pattern (Without Starting from Scratch)
Ever followed a crochet pattern exactly as written… and still felt like something was missing?
Maybe the colour didn’t feel right. Maybe the shape didn’t quite fit. Or maybe it just didn’t feel like you.
That’s where customising a crochet pattern comes in. And here’s the good news: you don’t need to be a designer to do it. With a few simple tweaks—like adjusting the size, switching stitches, or playing with yarn—you can make any crochet project feel personal, unique, and totally “you.”
In this post, you’ll learn how to customise any crochet pattern step-by-step. Whether you’re a beginner looking to experiment or a seasoned crocheter ready to put your own stamp on your work, these easy ideas will help you take creative control—without the overwhelm.
Let’s explore the art of customizing, and turn those patterns into pieces that truly reflect your creativity.
I Can’t Help Changing Things
Even before I started writing crochet patterns, I was constantly tweaking the ones I found.
I was just trying to make them fit. Fit my style, fit my yarn stash, fit the picture in my head.
I’d change a colour here, add a border there, maybe swap in a different stitch that felt more fun. I just wanted the end result to feel more like me.
Over time, those little adjustments gave me the confidence to trust my eye, play with new ideas, and eventually—yes—start designing my own. You don’t need to design from scratch to make something original, just need a willingness to play.
Let me show you how.
Start with the Why – Your Project, Your Personality
Think of a crochet pattern like a recipe. A recipe tells you how to make lasagne, but you might sprinkle in extra cheese or swap beef for mushrooms. Why? Because you know what you like—and your crochet projects deserve that same personal flavour.
Crochet is intimate. Every stitch holds time, energy, and a little piece of you.
So why settle for making someone else’s vision when you can bring your own to life?
You just need to listen to your instincts. Don’t love that colour combo? Change it.
Want it bigger, smaller, softer? You’ve got options.

Easy Ways to Customize Any Pattern
🧶 How to Start Personalising Without Overwhelm
Step 1: Choose just one thing to tweak
Look at the pattern and ask yourself: What part doesn’t feel quite right to me? It might be the color, the border, or the stitch style. Pick just one thing to change on your first try. This keeps it fun and low-pressure.
Step 2: Try a border or edging swap
Instead of finishing with the designer’s border, you might choose a picot edge, a crab stitch, or even a row of tassels. These are easy to test and don’t mess with the core structure.
Step 3: Play with color changes
Try striping a section that’s meant to be solid. Or swap in your favorite palette. Color is one of the easiest—and most impactful—ways to make a pattern feel like you.
1. Get Confident with Colour – Mix, Match & Make it Yours
Colour is the quickest way to leave your fingerprint on a project. You can follow a pattern exactly and still end up with something that looks wildly different—just by swapping the colours.
Let’s say you’re making a baby blanket. The pattern shows soft pastels—classic pinks, yellows, blues. But what if you want something a little bolder? Maybe deep purples and burnt oranges for autumn, or neutrals for a modern nursery.
That one change turns it from cute to custom.
Colour has emotion baked into it. You can go for moody or cheerful, minimal or maximal. There’s no wrong answer.
Quick tip: If picking colours stresses you out, start with a colour wheel. Choose complementary or analogous colours for harmony, or go monochrome and play with light and dark shades. Or just pull inspiration from a photo, a room, or even your favourite mug. If it makes you feel something, it’s the right choice. There is more on how to to select colour combinations in this post Choosing Yarns for Mood.
How to get started
Step 1: Start with inspiration, not rules
Think about what you're drawn to in nature, clothes, or home décor. Is it warm and earthy? Bold and bright? Muted pastels? Use those cues to create your color palette.
Step 2: Use the 60/30/10 rule
A simple way to balance colors:
60% = your main color
30% = your secondary color
10% = your accent color
This creates harmony and contrast without overthinking it.
Step 3: Swatch before you commit
Colour can behave differently once stitched. Crochet a small swatch in your chosen combo to see how it looks. You’ll know right away if it sings—or needs adjusting.
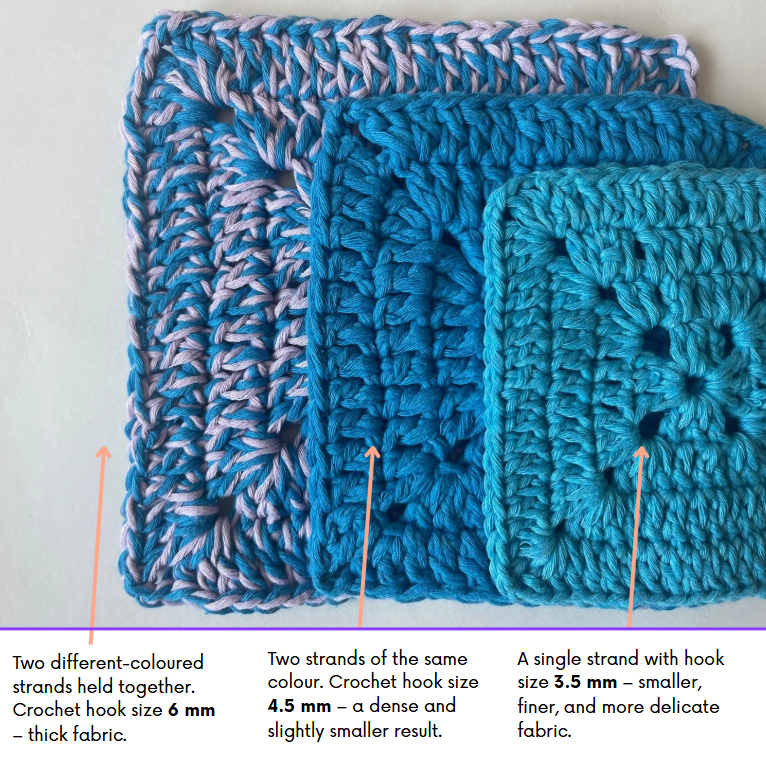
2. Switch Up Stitches – Simple Substitutions for Big Impact
Yarn choice can completely transform the look, feel, and even the personality of a pattern.
Take a simple shawl pattern in worsted-weight acrylic. Swap that for a brushed alpaca or a bamboo-cotton blend, and suddenly it drapes like water and feels like clouds. Same pattern, totally different experience.
Texture matters. Glossy yarns look sleek and polished. Matte yarns give off a soft, cosy vibe. Chunky wool feels rustic and warm, while lace-weight thread turns your project into delicate lacework.
One example: a basic granny square blanket made in thick, scrappy yarn feels vintage and homey. The same blanket in solid-colored cotton with clean joins looks modern and chic.
Just keep an eye on gauge. Swapping fiber types is fun, but it can totally change the size and drape if you’re not careful. If you’re working on wearables—like a sweater or hat—it’s worth doing a quick swatch to test the fit. For blankets, scarves, or wall hangings? Go wild and have fun with it.i
Changing the yarn s part of the magic. And to make it easier, the my Crochet Customisation Confidence Kit includes handy yarn substitution and gauge cheat sheets, so you can make changes with clarity and confidence.
How to get started
Step 1: Understand the stitch structure
Is the original made with basic stitches (like sc, dc, hdc)? Great—these are usually easy to swap. For example, replace a row of double crochet with a textured stitch like the lemon peel or the grit stitch.
Step 2: Check your stitch height
When substituting, make sure the height of your stitch matches the original. Swapping a single crochet for a triple crochet will throw off your row height and shape.
Step 3: Test on a sample
Pick one section of the pattern—maybe just a few rows—and try your stitch swap there. This lets you test the look and feel before committing to the entire project.
📄 Not sure where to start? The kit includes a Stitch Swap Cheat Sheet with easy tips on how to get started.
3. Add Borders, Edging, or Trims – The Finishing Touches That Make It Yours
You finish the body of a project but it doesn’t quite pop. That’s where a border or trim saves the day.
A few rows of contrasting colour? Instantly eye-catching.
A scalloped edge on a plain dishcloth? Suddenly gift-worthy.
Crab stitch, picot, shell edging—these are little tricks that whisper, "I made this my own."
Here’s an idea: if you’ve made a basic square baby blanket in one colour, add a striped border using two or three accent colours. Not only does it tie the whole piece together, but it also adds visual rhythm.
Borders are an easy way to add personality. And because they’re usually the last step, you can decide on the fly—no pressure.
How to get started
Step 1: Choose the right kind of border
Think about the mood you want. Want something delicate? Go for a lacy shell border. Looking for clean and modern? A round or two of single crochet might be all you need. Want playful? Add pom-poms or fringe!
Step 2: Match the stitch count
Before diving in, count the stitches along your edge. Most border patterns are written to fit stitch multiples (like “repeat every 5 stitches”). Adjust slightly by increasing or decreasing stitches if needed—it doesn’t have to be perfect, just balanced.
Step 3: Test on a corner
Corners can be tricky! Try working your chosen border around one corner first. This gives you a feel for how the stitches behave and helps you see if the trim enhances or distracts from the overall design.
Step 4: Use a contrasting colour—or not
A border in a different colour adds pop. But a border in the same shade gives subtle polish. Both are beautiful. Follow your instinct and don’t be afraid to try both on a swatch first.
4. Size Matters – Resizing Your Crochet Pattern Without the Stress
This one’s all about playing with scale. Sometimes, a pattern is perfect… but not quite the size you had in mind.
Maybe the tote bag is too small. Or the throw blanket is more of a lap cover. Or the hat is snug when you want slouchy.
Changing the size doesn’t mean rewriting the pattern from scratch.
Often, it’s as simple as adjusting your hook size or yarn weight.
Want it larger? Use a bigger hook.
Want it finer? Try a smaller yarn.
Let’s say you’re following a pattern for a set of coasters, but you want matching placemats. Double the yarn weight, size up your hook, and increase the stitch count to maintain the shape. Voilà—same pattern logic, just zoomed out.
Even changing the tension you crochet with can affect the size and drape. So if you tend to crochet tightly, try loosening up—literally and figuratively.
Another option: add or subtract pattern repeats. That might sound intimidating, but for things like granny squares, chevrons, or basic rows, it’s usually just a matter of repeating the same steps more (or fewer) times.
How to get started
Step 1: Look at the stitch repeat
Most patterns use stitch multiples. For example, the pattern might say “multiple of 4 + 2.” That tells you how to size up or down while keeping the stitch pattern intact.
Step 2: Measure and multiply
Want a wider scarf or a longer blanket? First, crochet a small swatch, measure your stitches per inch, and then multiply by your desired size. This gives you the foundation stitch count.
Step 3: Don’t forget proportions
If you change the width, think about the height too. Sometimes, a project will look “off” if it’s too long or short compared to its new width. Adjust rows accordingly.
📐 To help with this, the Customisation Kit includes a Resizing Reference Sheet to walk you through stitch math with zero overwhelm.
5. Add Personal Embellishments – Your Signature, Your Way
Here’s where your inner artist really comes out. Think of embellishments as finishing touches—a little sparkle, a hidden detail, a secret wink from maker to recipient.
Try adding:
Appliqués: hearts, stars, flowers, initials
Surface crochet: lines, swirls, or outlines
Buttons or beads for texture and flair
Embroidery stitched over the top
You could take a plain baby beanie and add tiny felt ears. Or embroider a name onto the corner of a blanket. Or weave ribbon through the eyelets of a lacy shawl.
These touches often mean the most. They’re what make someone pause and say, “Wait… you made this?”
If you’re gifting something, adding a personal symbol or detail makes it unforgettable. If your project didn’t go exactly to plan, a little embellishment can disguise mistakes and turn “oops” into “wow.”
How to get started
Step 1: Pick your embellishment vibe
Are you going for playful? Sophisticated? Rustic? Decide how you want the final piece to feel before choosing your add-ons. That intention will guide you toward the right details—think buttons, beads, embroidery, or even crochet appliqué.
Step 2: Choose the right material
Use lightweight embellishments for wearables, like small wooden buttons or a bit of embroidery thread. Heavier items like tassels or chunky patches are perfect for home décor pieces where weight doesn’t affect fit or comfort.
Step 3: Plan placement first
Lay your finished piece flat and “audition” your embellishments before attaching anything. Pin them in place or lay them out visually. Sometimes, less is more—and seeing it laid out helps prevent over-cluttering.
Step 4: Attach with intention
Use a yarn needle and matching thread or yarn to sew on pieces securely. For items that will be washed or used frequently, make sure everything is fastened tightly and consider double stitching for durability.
When to Break the Rules (and When to Follow Them)
The trick is knowing which parts of a crochet pattern are flexible and which ones keep the project from falling apart.
Follow the rules when:
You’re working on garments that need to fit properly
You’re using structural stitches (like cables or lace) where stitch count really matters
The pattern includes shaping—think sweaters, socks, hats
In those cases, changing too much without planning ahead can lead to a weird fit or a floppy mess.
Break the rules when:
You’re choosing colours, yarn types, or embellishments
The project is flat and doesn’t need shaping (think scarves, blankets, coasters)
You feel like trying something new—even if it’s just to see what happens
A little experimentation is where most crocheters level up. You learn by trying, not by sticking perfectly to the plan.
And guess what?
If something doesn’t turn out the way you hoped, it’s not a failure—it’s feedback. Every stitch is a stepping stone.
The more you customise, the more you trust your gut. And that trust? That’s where creative confidence is born.
Go Bold – Add Design Details that Reflect You
✨ How to Add Flair Without Losing the Pattern’s Shape
Step 1: Pick a project with room to play
Start with simpler patterns like gran, tote bags, or scarves. These flat, flexible pieces are perfect for bold add-ons like tassels, stripes, or surface embroidery.
Step 2: Layer in personality
Try adding stripes where none exist. Add a pocket to a tote. Stitch on some applique. These don’t change the function—but they definitely upgrade the vibe.
Step 3: Don’t fear contrast
Your touches don’t have to “match” the original. Sometimes the most striking customisations are the ones that contrast—bright accents, unexpected textures, even a fun patch or label.
Ready to Put Your Signature on Every Stitch?
Every crochet pattern holds possibility—but you bring the magic. The moment you trust your instincts, tweak a detail, or add a personal flourish, your work stops being “just a pattern” and becomes something unmistakably yours. So don’t be afraid to color outside the lines. Your creativity isn’t a risk—it’s a revelation. And if you’re ready to take your custom touches to the next level, grab the free Crochet Customization Kit below. It’s packed with ideas, guides, and easy wins to help you turn any pattern into a reflection of you—confident, creative, and totally one-of-a-kind.
What’s Next?
📌 Pin this post: Save it to your Pinterest boards so you can come back whenever you need a little inspiration.
💬 Join the conversation:
What spoke to you most? Which technique will you try first? Drop a comment below—I read every one, and I’d love to hear where you’re at in your crochet journey.
🎁 Grab the Crochet Customisation Confidence Kit:
Want to start adding your personal touch right now? This Kit walks you through the exact steps to tweak, tailor, and transform any pattern into something uniquely yours. Patterns, prompts, and confidence boosters included.
🧶 Keep the calm going:
Looking for your next peaceful project?
▶ Eco-friendly crochet kits – everything you need to get started, stress-free.
▶ Easy crochet patterns – simple, satisfying, and perfect for building confidence.
More inspiring posts


Create a home filled with handmade details. Discover 8 crochet home décor ideas, from plant pot covers and hanging holders to practical baskets and beautiful accessories you’ll love to make and use every day.