Joining Granny Squares
Stitched joins (or seams) use a needle to connect your granny squares or crochet pieces — and they’re a simple, reliable way to achieve beautiful results. Whether you want a completely invisible finish or a decorative accent, there’s a stitched join for every style.
Here is an easy technique to get you started.
Avoiding Messy Seams
Before joining your granny squares, block them first to even out the edges and make sure every stitch lines up neatly. Once your squares are aligned, use stitch markers to secure the corners — this keeps everything in place and prevents your pieces from shifting as you work.
Invisible Seam Stich
Also known as the mattress stitch or ladder stitch, this method is perfect when you want to join pieces without adding any visible seam. It creates a smooth, clean finish — ideal for projects where you want the focus to stay on the crochet itself..

Instructions
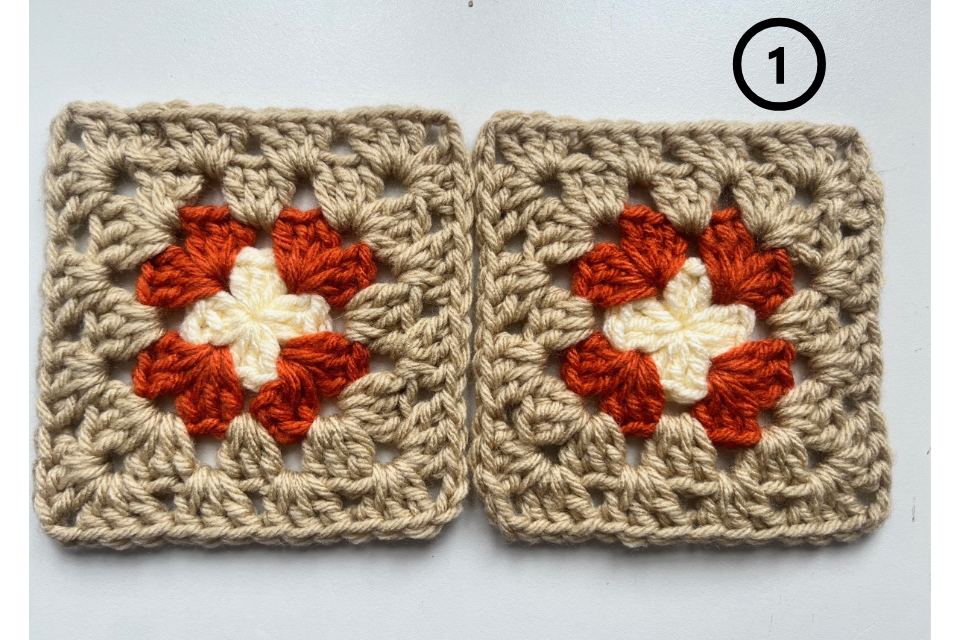
Hold your pieces together with the right sides facing out. Make sure all stitches line up neatly along both edges. (See image 1)
For this stitch, insert the needle through the top centre of each stitch. Looking at image 2, you’ll see that we’re working around the lower part of the loop, not the top edge that’s closer to you. (Also shown in image 3.)
Insert your needle through the top centre of the first stitch on one side. (See image 4.)
Bring the needle up through the bottom centre of the next stitch on the same side. (See image 5.)
Repeat these steps on the opposite piece, matching each stitch as you go. (See image 6.)
Every few stitches, lay your work flat and gently pull both ends of the yarn — you’ll see the seam disappear as the edges draw together.
✨ Tip: Keep your tension even — not too tight, not too loose — for a perfectly invisible finish.