
Crochet a Halloween Pumpkin - Free Pattern
Mouse and Sparrow may earn a commission for purchases after clicking links on this page.
Halloween is just around the corner, and what better way to get into the festive spirit than by crocheting your very own pumpkin? Whether you’re a beginner crocheter, a Halloween enthusiast, or a DIY crafter, this simple and fun project is perfect for adding a touch of handmade charm to your décor.
Ready to get started?
Let's crochet a pumpkin!

🧡 Want to download this pattern? Grab your printable copy here.
I would love to see these pumpkins made in all the different autumn colours, they make such a great addition to any fall decor, and crafting your own makes them even more special. Why not create a bunch and offer them at holiday markets and craft fairs?
The body of the crochet pumpkin is made from a rectangle, and made with a stitch that is a one-row repeat?!
Talk about a super easy pattern!
If you're familiar with the single crochet stitch and can crochet a flat rectangle, you're already on your way to creating your pumpkins.
Why you’ll love these pumpkins!
Personal Touch: Handmade decorations add a unique and personal touch to your Halloween setup.
Cost-Effective: Use scrap yarns and leftover materials to create something special.
Fun and Relaxing: Crocheting can be a therapeutic and enjoyable activity.
Scrap Yarn Buster: Transform leftover yarn of all weights into charming pumpkins! Versatile and customizable, you can craft pumpkins in small, medium, large, or even extra-large sizes to suit your decor needs.
New to crochet? This should help to get you started: A Beginner's Guide to Crochet
For further tutorials, check out Craftsy and Skillshare, they offer invaluable resources.
Craftsy provides an extensive library of crochet classes tailored to beginners and advanced crocheters, ensuring you can find guidance as you nurture your new hobby.
Free crochet pumpkin pattern
This free crochet pumpkin pattern is perfect for beginners!
Unlike more complex patterns that require working in the round, these pumpkins are crafted from a simple flat crochet rectangle. This approach makes the process easy to crochet a pumpkin.
Materials You’ll Need
Yarn: Orange for the pumpkin and brown for the stem. Choose a medium-weight yarn for the best results. For this project, I used the Gründl Amigurmi yarn, 100% cotton yarn, 10g.
However, you could easily switch out this yarn for a chunky yarn or bulky weight yarn with a corresponding hook and make even larger pumpkins.
Crochet Hook: Size recommended for your chosen yarn (usually 4.0mm or 5.0mm). I used a 3.5 mm hook for this pumpkin.
Tapestry Needle: For weaving in ends and assembling the pumpkin.
Fiber Fill: For stuffing the pumpkin.
Scissors.
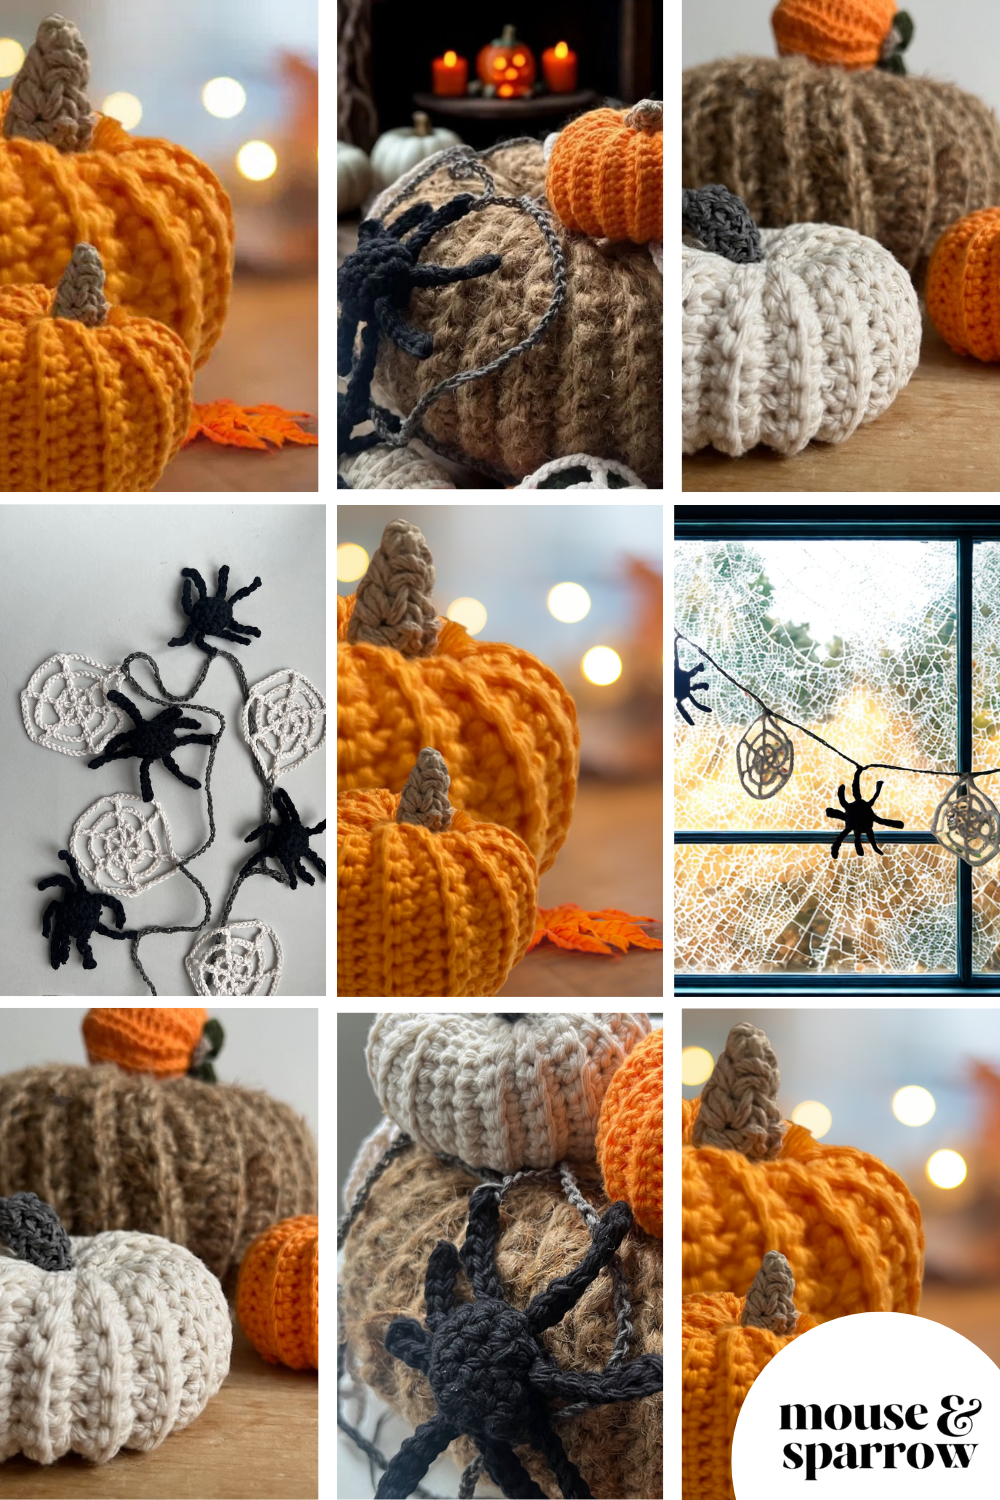
🎃 Ready to go beyond one pumpkin and create a full Halloween décor set in a weekend?
Imagine your home decked with a matching pumpkin, a spooky spider, and a delicate web garland — all crocheted by you, and finished in one weekend.
The Halloween Crochet Set gives you:
• A print-friendly pumpkin pattern (that you’re already working on)
• A beginner-friendly spider pattern
• A detailed spider-web pattern
• Step-by-step instructions to assemble it as a garland
All for just $7.50 (less than your weekend coffee).
🎃 Get the full set
And if you’d rather stick with just the free pumpkin, no problem — the bundle is here if you’re ready for the next step.
CROCHET PUMPKIN SIZING TIP:
To determine the perfect size for your crochet rectangle, aim for the longer side to be about 2.5 times the length of the shorter (chain) edge.
For instance, if your rectangle's width is 5 inches, continue crocheting until the length reaches approximately 12.5 inches (5 x 2.5).
Skill Level – Easy / Beginner
You can purchase the downloadable, printable, PDF pattern with picture tutorials and a stitch guide here.
Pin to Pinterest to save for later!
Notes:
Each pumpkin is made from a flat rectangle.
This pattern is using US terminology.
(SC, Single Crochet: US = DC, Double Crochet: UK)
Step-by-Step Guide
Step 1: Crocheting the Pumpkin Body
Step 1:
Chain Foundation. Start with a tail of about 20 cm and chain 21.
Row 1:
1 single crochet (sc) in the second chain from the hook.
1 sc into each chain to the end [20 sts].
Row 2:
Chain 1.
1 sc back loop only into each stitch until the end.
Repeat Row 2:
Repeat Row 2 for an additional 35 rows.
Step 2: Assembling the Pumpkin
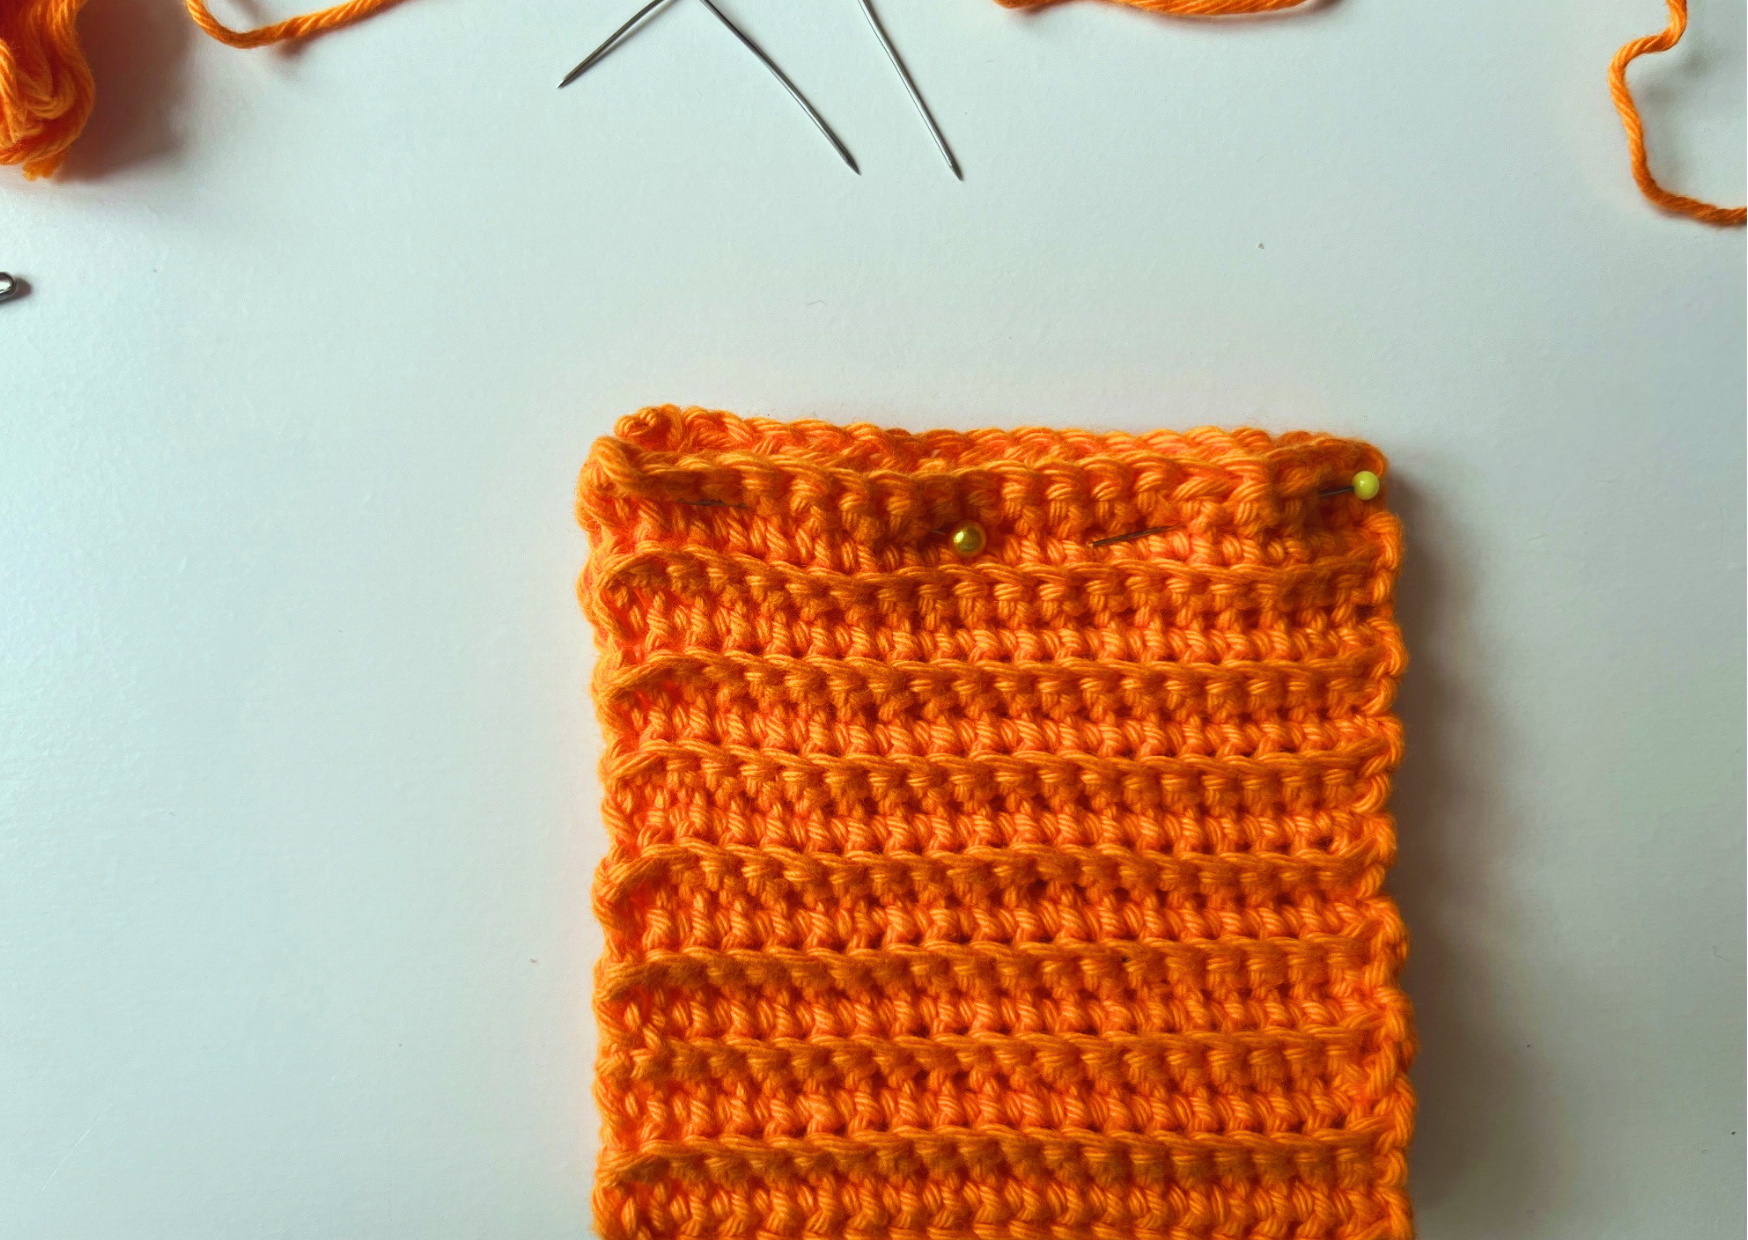
Step 1:
Fold your work in half to align the last and foundation rows.
Join the two rows with a slip stitch across.
Step 2:Weave the yarn tail through the stitches around the bottom opening.
Pull tight and tie a knot.
Step 3:Turn your pumpkin right, side out and stuff it lightly with fibre fill.
Avoid overstuffing to maintain a nice round shape.
Step 4:
Cut 20 cm of yarn to close the top.
Weave the yarn through the stitches around the top opening.
Pull tight and tie a knot.
Step 5:
To create the classic dent and ridges on your crochet pumpkin, start by threading a long tail of yarn through a needle.
Insert the needle through the centre at the top of the pumpkin and push it all the way through to the bottom. Gently pull the yarn to form a slight dent, which will begin shaping your pumpkin. Bring the needle back up through the centre and repeat the process.
Aim to thread the yarn through about six times, evenly spacing each loop around the pumpkin to craft the signature ridges. Each pass adds more definition, turning your crochet piece into a pumpkin.
Love how this is coming together? Want to turn it into a full set that wows?
Check out the Halloween Crochet Set — three patterns, full instructions, beginner-friendly.
The **Halloween Crochet Set** includes:
• The pumpkin pattern (print-friendly)
• A spooky spider pattern
• A delicate spider-web pattern
• Step-by-step assembly instructions
🎃 Grab the Set for $7.50
Step 3: Making the Stem
Step 1:
Using brown yarn, chain 5.
Step 2:
Single crochet in the second chain from the hook.
1 single crochet in the next 3 chains.
Step 3:
Fasten off and attach the stem to the top dent of the pumpkin.

🧡 Want to download this pattern? Grab your printable copy here.
Common Mistakes and How to Avoid Them
Not Counting Stitches:
An uneven stitch count can lead to a misshapen pumpkin. Always count your stitches to maintain consistency.
Overstuffing:
Too much stuffing can distort the shape. Stuff lightly to keep the pumpkin round.
Tight Tension:
Crocheting too tightly can make the pumpkin difficult to stuff and alter the stitch appearance. Keep a relaxed tension.
Insecure Ends:
Not weaving in ends securely can lead to unraveling. Ensure you weave in ends thoroughly for durability.
Wrong Hook Size:
Using the incorrect hook size can change the size and shape of your pumpkin. Match the hook size to the yarn recommendation.
More quick and easy crochet project ideas: 6 Beginner-Friendly Crochet Projects You Can Finish In A Day
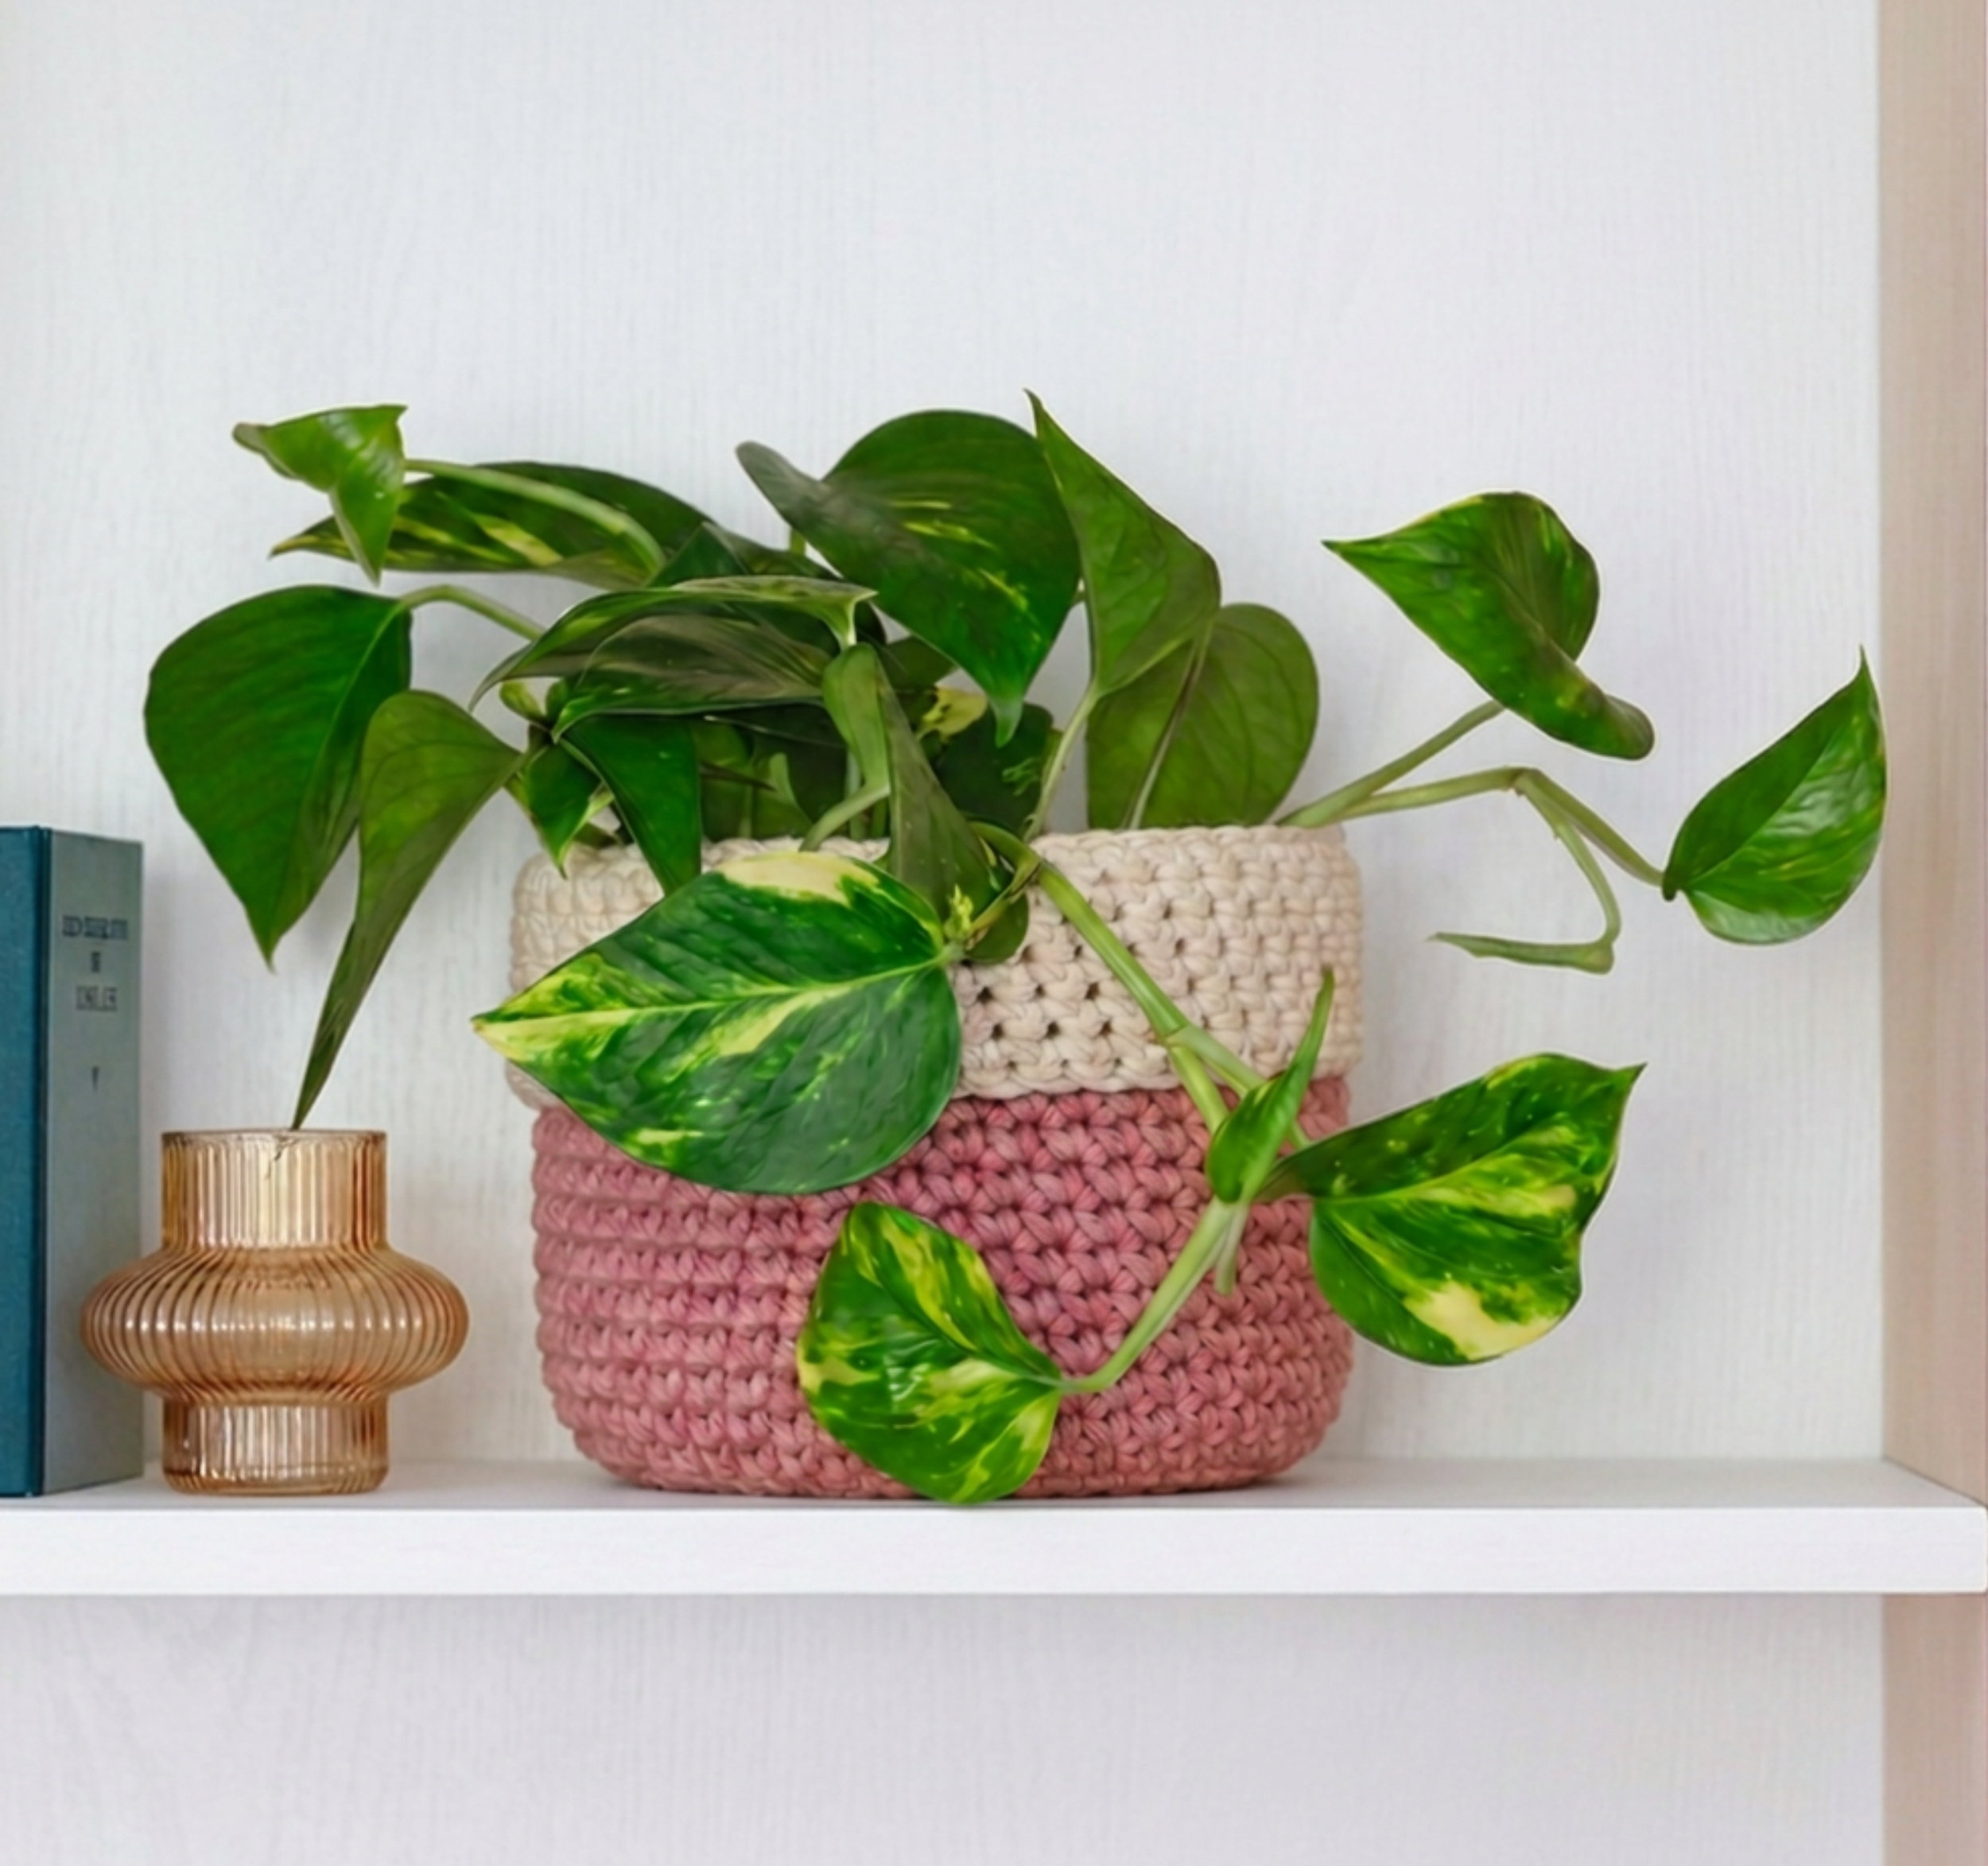
How to decorate your home with crochet pumpkins
I love to use my crochet pumpkin selection to decorate my home in autumn.
Here are some tips on how you can use yours:
Inside your home, arrange a centrepiece by clustering crochet pumpkins of varying sizes and colours on your dining table, paired with autumn leaves.
For outdoor spaces, consider placing these pumpkins on your porch steps or around your entryway.
They can also be nestled into wreaths or garlands for a festive seasonal display.
In living rooms, scatter them across mantels or shelves.
🎃 Finished your pumpkin? Now complete the set.
Over 3,000 makers have already brought this pumpkin pattern to life. You have the chance to go further: turn it into a spider + web garland that guests ask about.
For just $7.50 you receive:
• The pumpkin pattern (print-friendly, easy follow)
• A spooky spider pattern (complete with assembly)
• A detailed spider-web pattern (tutorial included)
• Full instructions to turn them into a hanging garland — ready to display.
Now’s the moment: Halloween is approaching — this week is the time to start it so you enjoy it in-time.
👉 Get the Full Halloween Pattern Bundle Here!
(Make sure to start today so you’re ready before Halloween night.)
Now that you know how to crochet a small Halloween pumpkin, it’s time to get creative!
Share your finished creations with us on Instagram using #MouseAndSparrow or download our premium pattern version with step-by-step photo instructions from our website.
Happy Crocheting and Happy Halloween! 🎃🧡
What's Next?
📌 Pin this post: Save this tutorial to your Pinterest boards so you can easily come back to it later.
💬 Leave a comment: We love hearing your feedback. Tell me in the comments below—how did this square go for you? This simple pattern works beautifully as a standalone design element or as part of a larger project.
🧡 Love this project? Make it a full Halloween garland! The best-selling pumpkin pattern is now part of a special Halloween Crochet Pattern Bundle. Get the ad-free PDF with patterns for a pumpkin, a spooky spider, a detailed spiderweb, and step-by-step instructions to turn them into a stunning garland.
Get the complete Halloween Crochet Pattern Bundle for $7 here!
More inspiring posts


Bring your Halloween decorating to life with this easy crochet bat pattern. Learn how to crochet bats with clear instructions, step-by-step photos, and beginner-friendly guidance. These small seasonal decorations are quick to make, fun to display, and perfect for adding a unique touch to your autumn home. Discover how a simple crochet project can become a Halloween favourite you'll bring out year after year.