
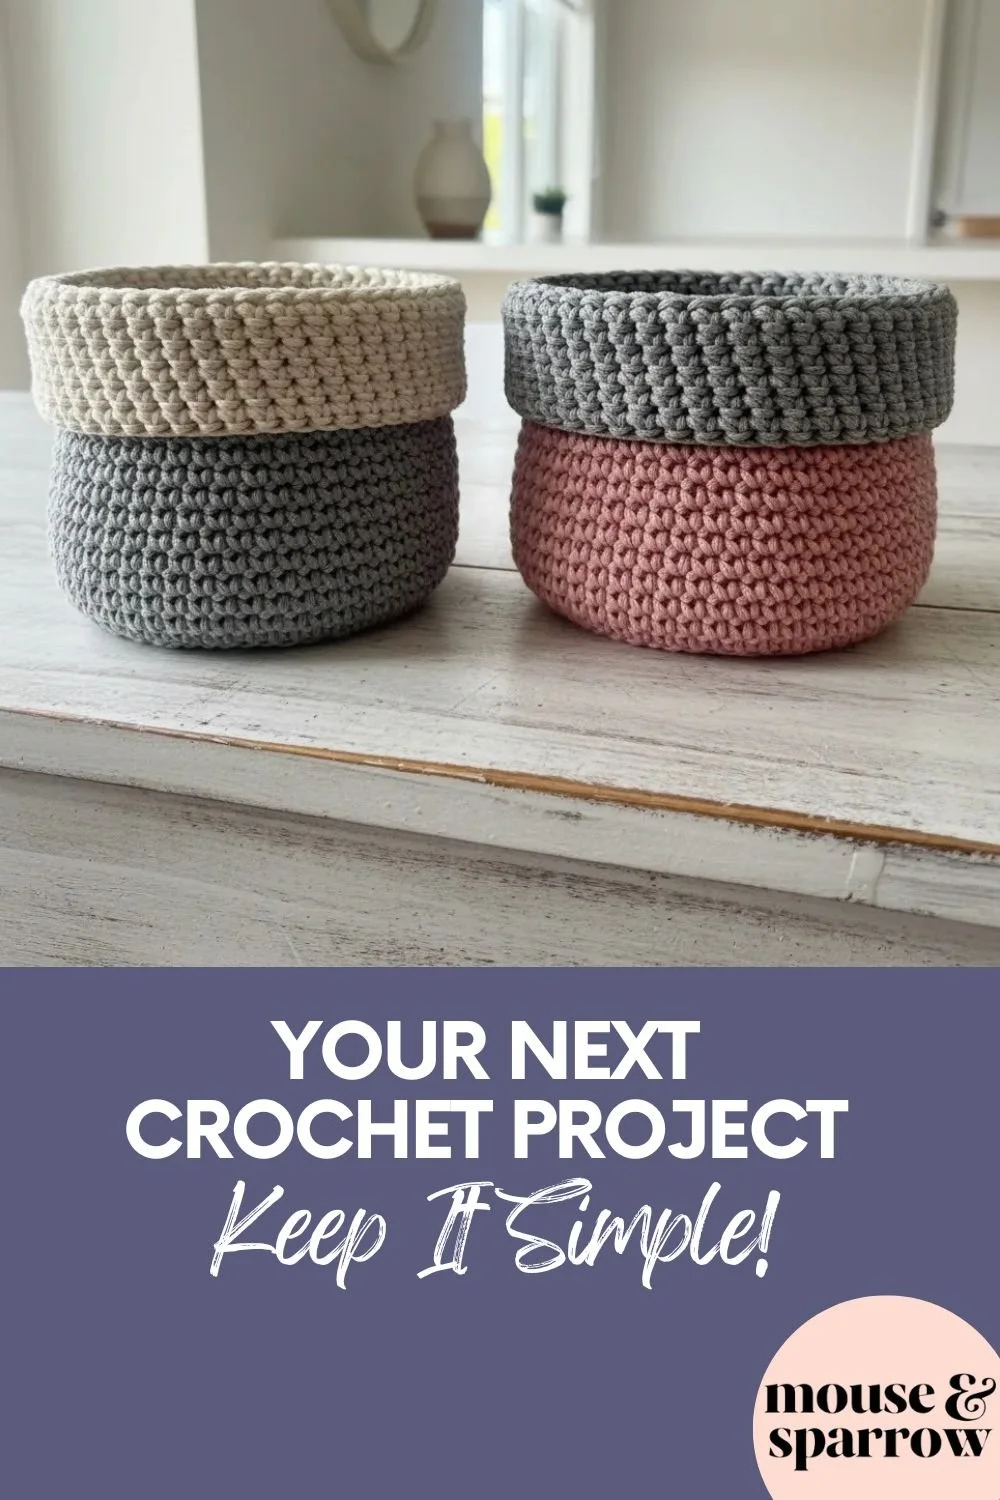
Crochet Basket for Beginners (Simple Stitches That Actually Work)
This post contains affiliate links.
If you’ve ever started a crochet basket and ended up with floppy sides, uneven shaping, or another unfinished project sitting in a drawer — this one is different.
This beginner-friendly basket uses simple stitches, clear structure, and a gradual increase method that helps it hold its shape, so you can actually finish it and use it in your home.
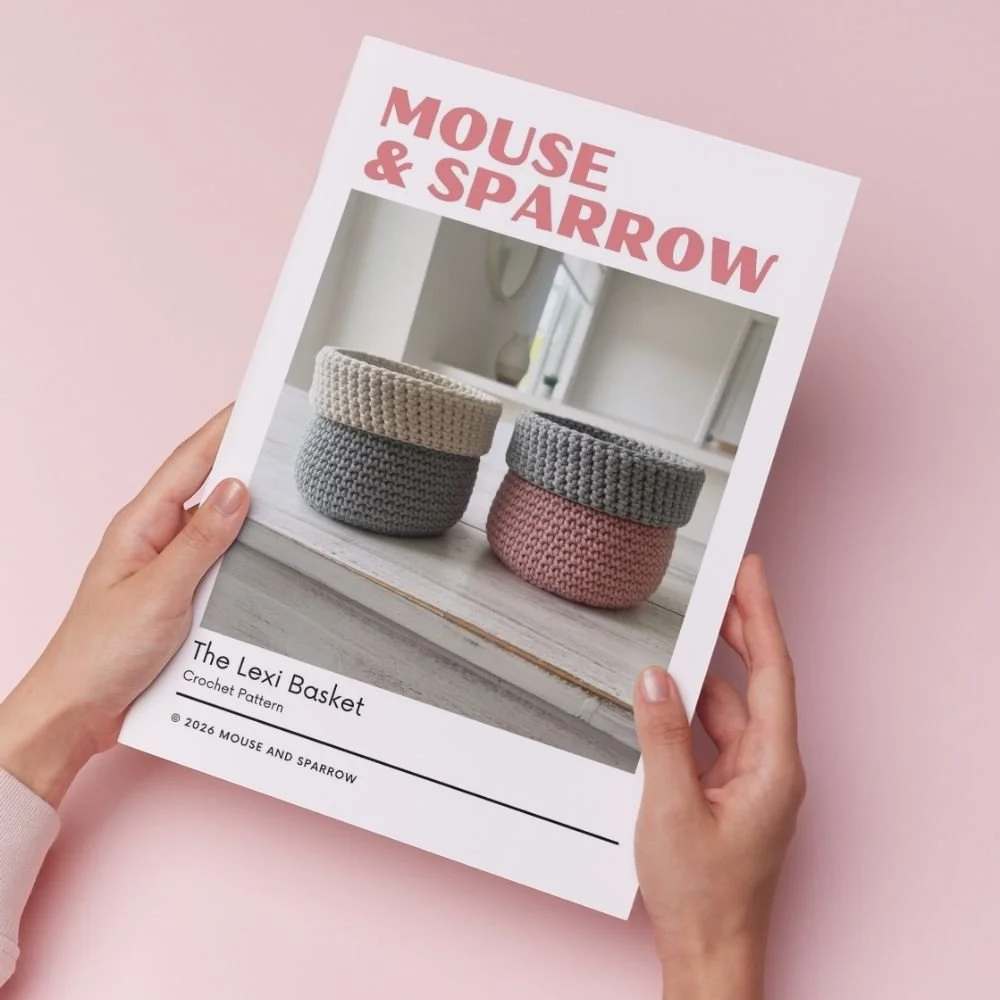
The free crochet basket pattern is below, or you can purchase the printable PDF here.
📌 Save This For Your Next Crochet Session. This crochet basket pattern is something you can make in a weekend — even if you’re a beginner.
Today I’m sharing a simple crochet basket pattern that’s perfect for beginners — easy to make, practical, and something you’ll actually use around your home.
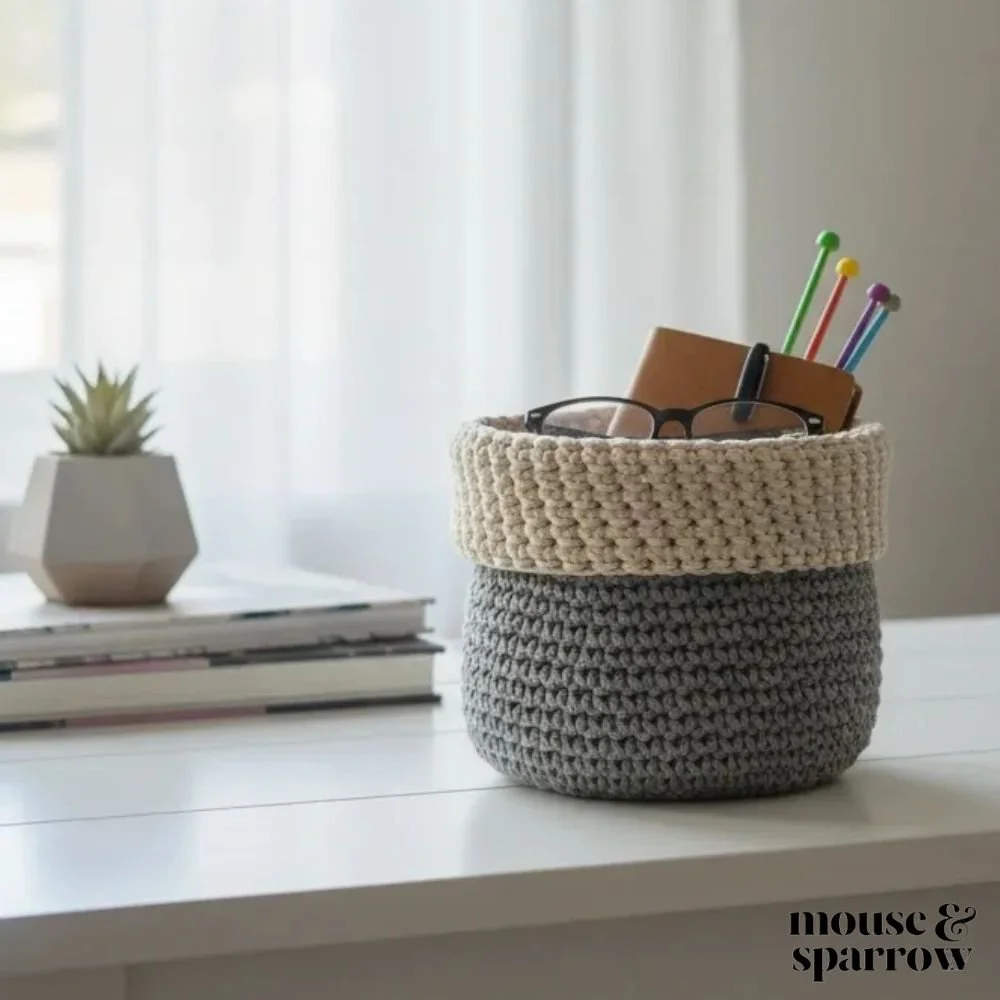
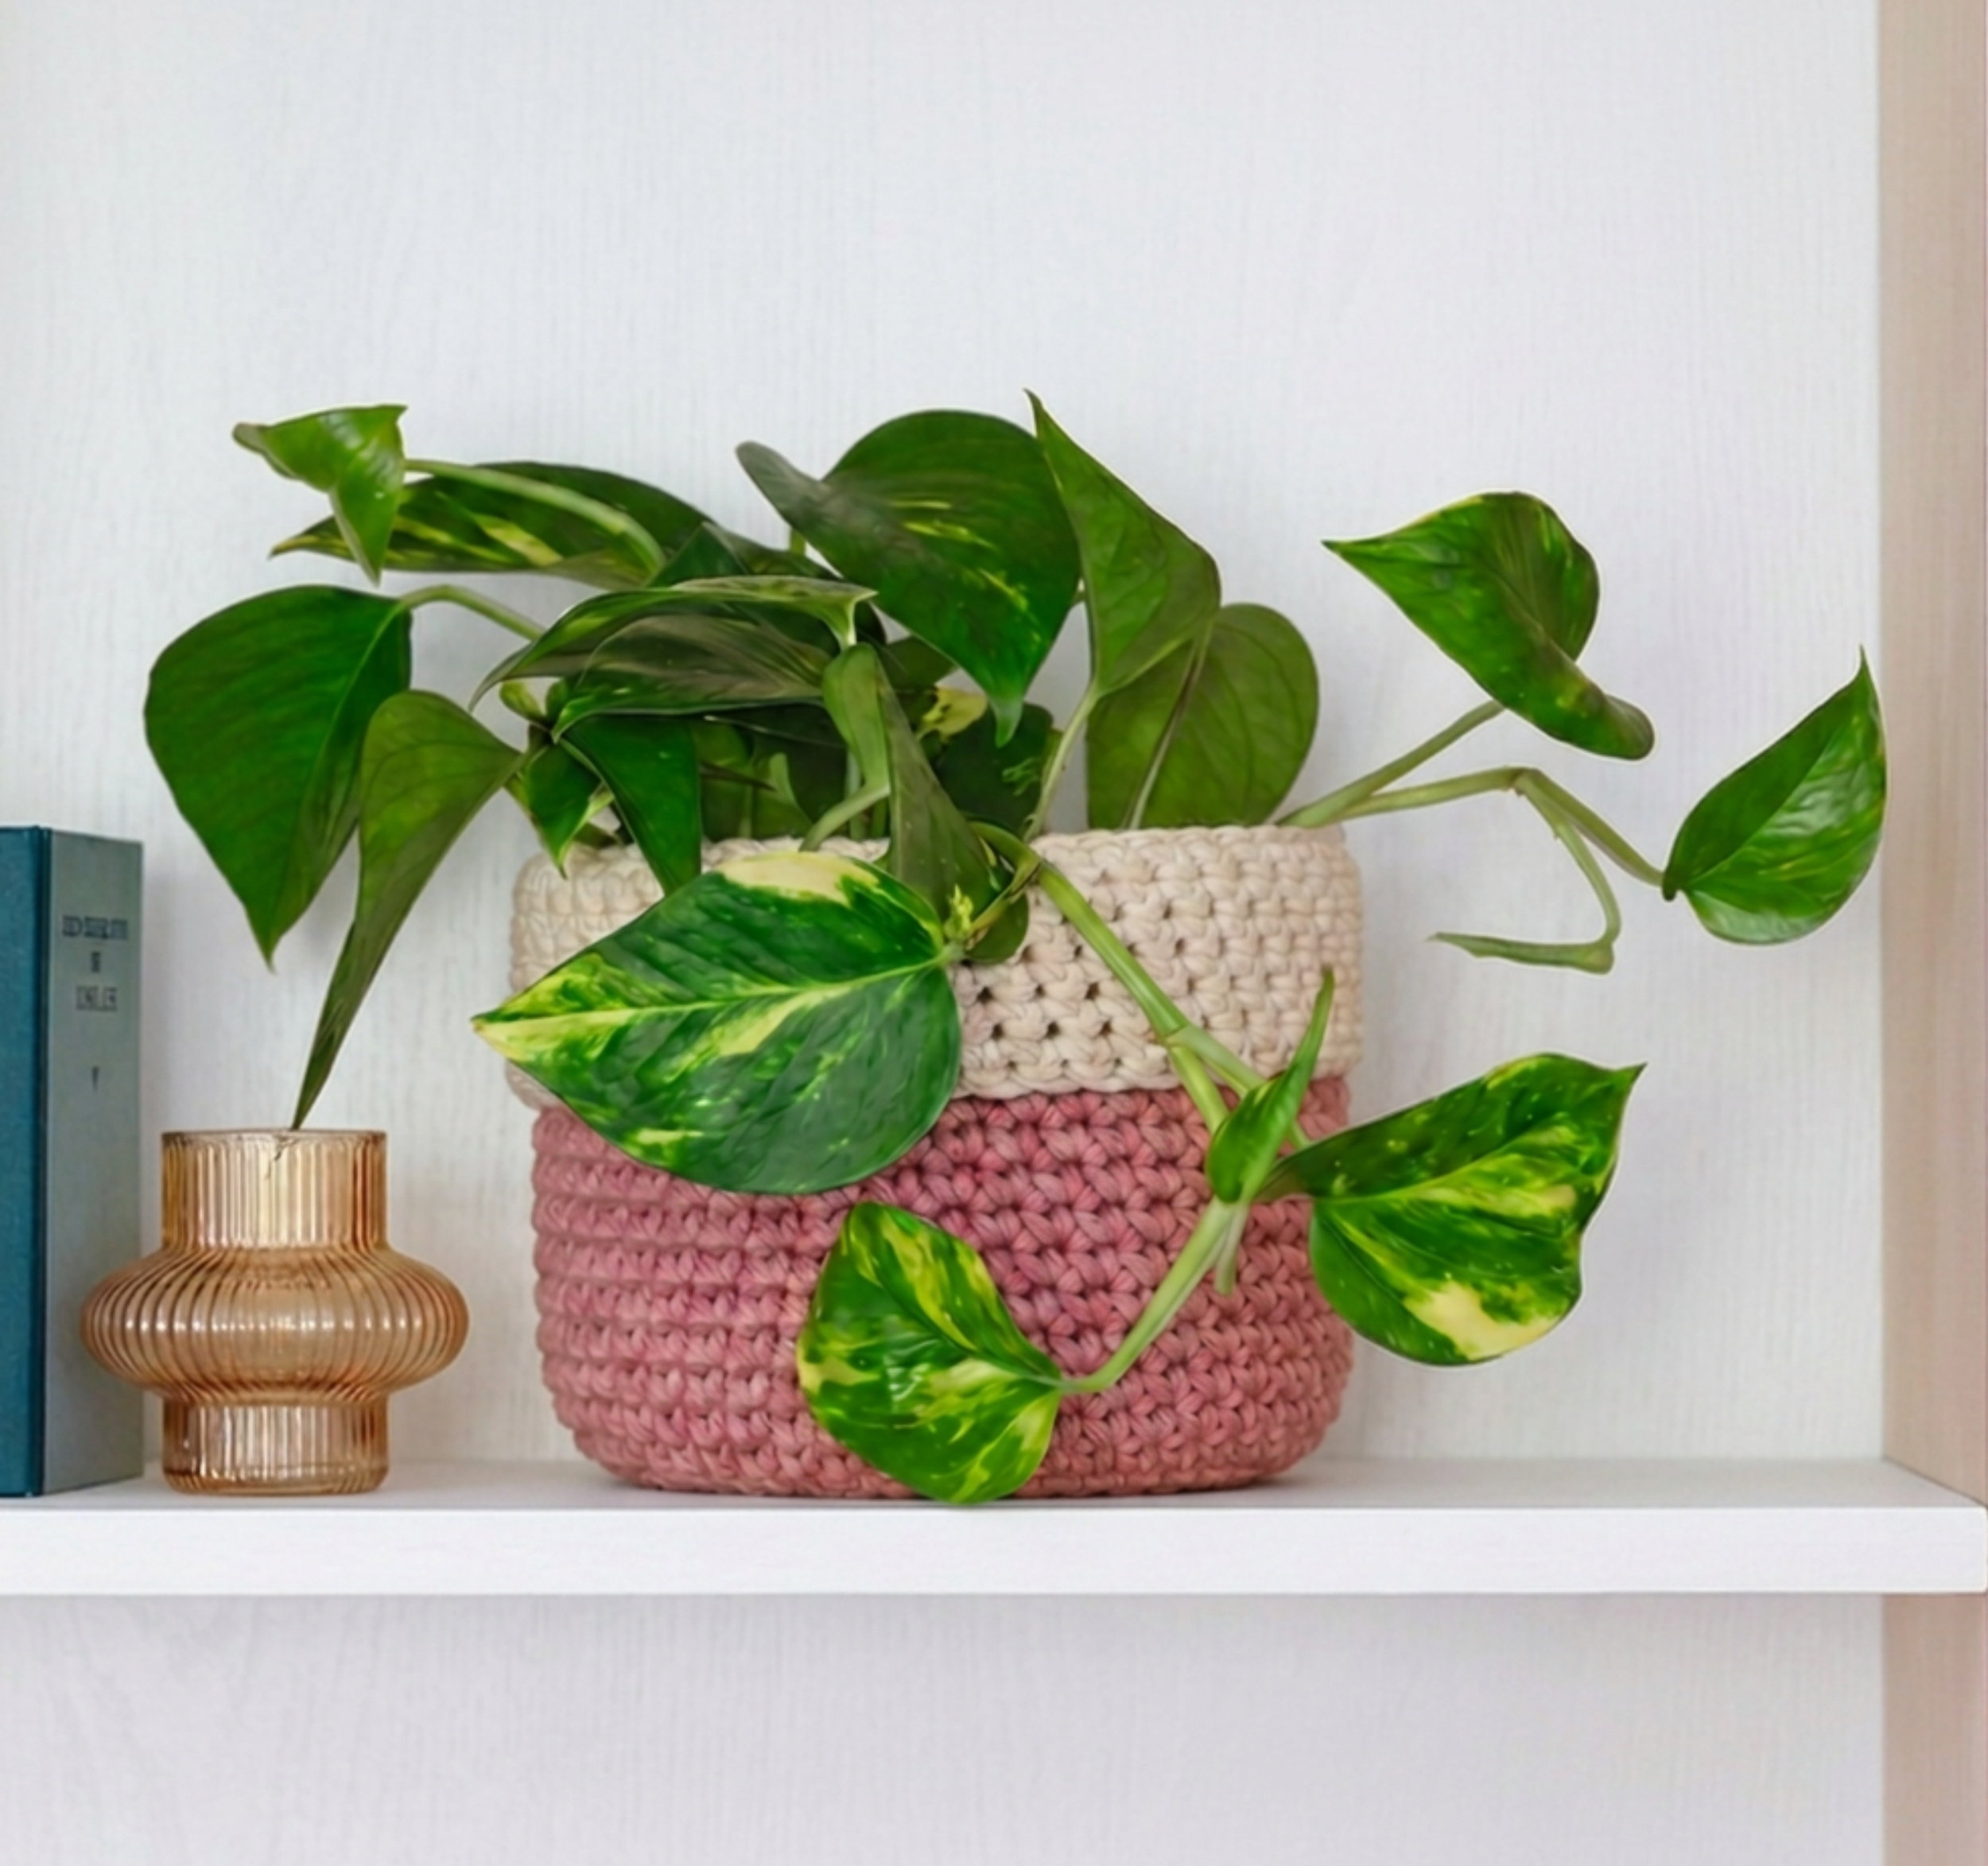
These small baskets are great for keeping things organised, whether that’s yarn, bathroom essentials, or all those little bits that tend to pile up. I use mine for drawer storage, but they work just as well on shelves or in the bathroom,
WHY THIS CROCHET BASKET PATTERN WORKS
To crochet a simple basket for beginners, use basic stitches like single crochet, start with a flat circle base, and increase gradually to keep it even. Then work straight rounds to build the sides and choose a cotton yarn for better structure.
This pattern is designed for beginners who want something simple but still get a great result — it uses only basic stitches, follows a clear and repeatable structure, avoids complicated shaping, and can be finished in 3–5 hours.
The result is a practical, sturdy basket you can actually use — the kind of project you can start and finish without getting stuck halfway through.
What I Tried That Didn’t Work
My first version of this basket was much softer and didn’t hold its shape the way I wanted.
I tried using a looser stitch pattern and a larger hook, but the sides turned floppy and the basket lost its structure very quickly.
Switching to simple single crochet, using cotton yarn, and working with a tighter tension made a huge difference. The basket became sturdier, held its shape better, and actually worked as practical storage instead of just decoration.
Sometimes the simplest version really is the best one.
Read to make this crochet basket? Prefer a printed version? Grab the PDF and crochet without the screen!
MATERIALS
Yarn I used (and recommend):
👉 My favourite yarn for this basket: DMC Eco Vita Recycled Cotton
This yarn gives the basket its structure and helps it hold its shape.
👉 Alternative: Any worsted weight cotton yarn
Choose something with a firm feel for best results.
👉 Softer option: Cotton blends
These work, but your basket may be less structured.
You’ll also need:
SKILL LEVEL + DETAILS
Skill: Beginner
Time: Approx. 3–5 hours
Size: Approx. 12 cm height / 12 cm diameter
Terms: US crochet terms (UK version available)
IMPORTANT NOTES
Keep your stitches tight for structure
Use a stitch marker to track your rounds
Avoid using a larger hook — this can make the basket floppy
STITCHES USED & ABBREVIATIONS - US Terms
Chain stitch - ch
Slip stitch - sl st
Single Crochet - sc / [UK: Double Crochet - dc]
If you are new no crochet check out this post on how to do a single crochet and this post on how to master basic crochet stitches.
SPECIAL STITCH
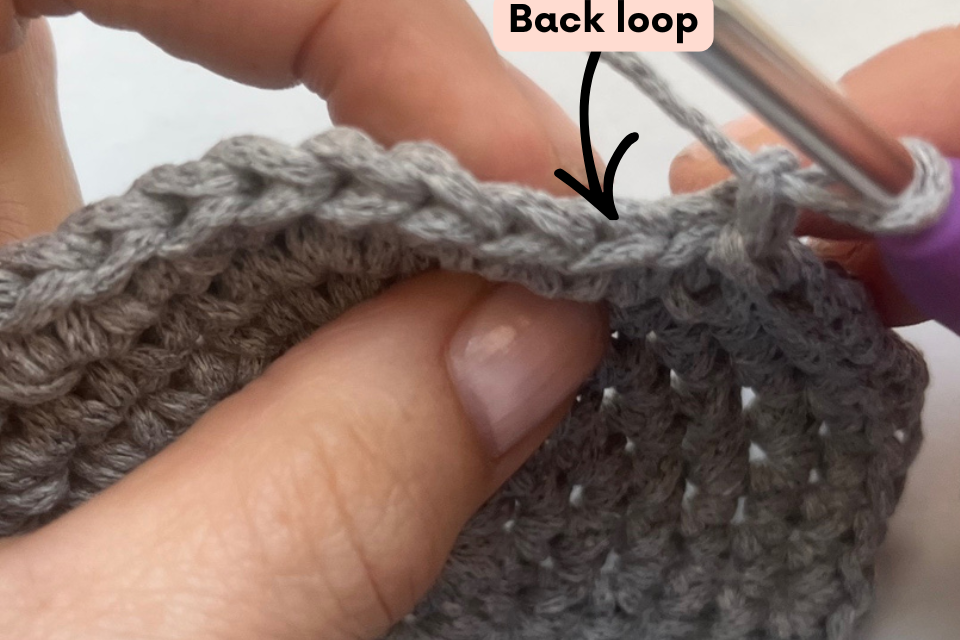
Back Loop Only (BLO):
One round is worked in the back loop only to create a defined ridge at the base of the basket.
Instead of inserting your hook under both loops of the stitch, insert it into the back loop only and complete the stitch as usual.
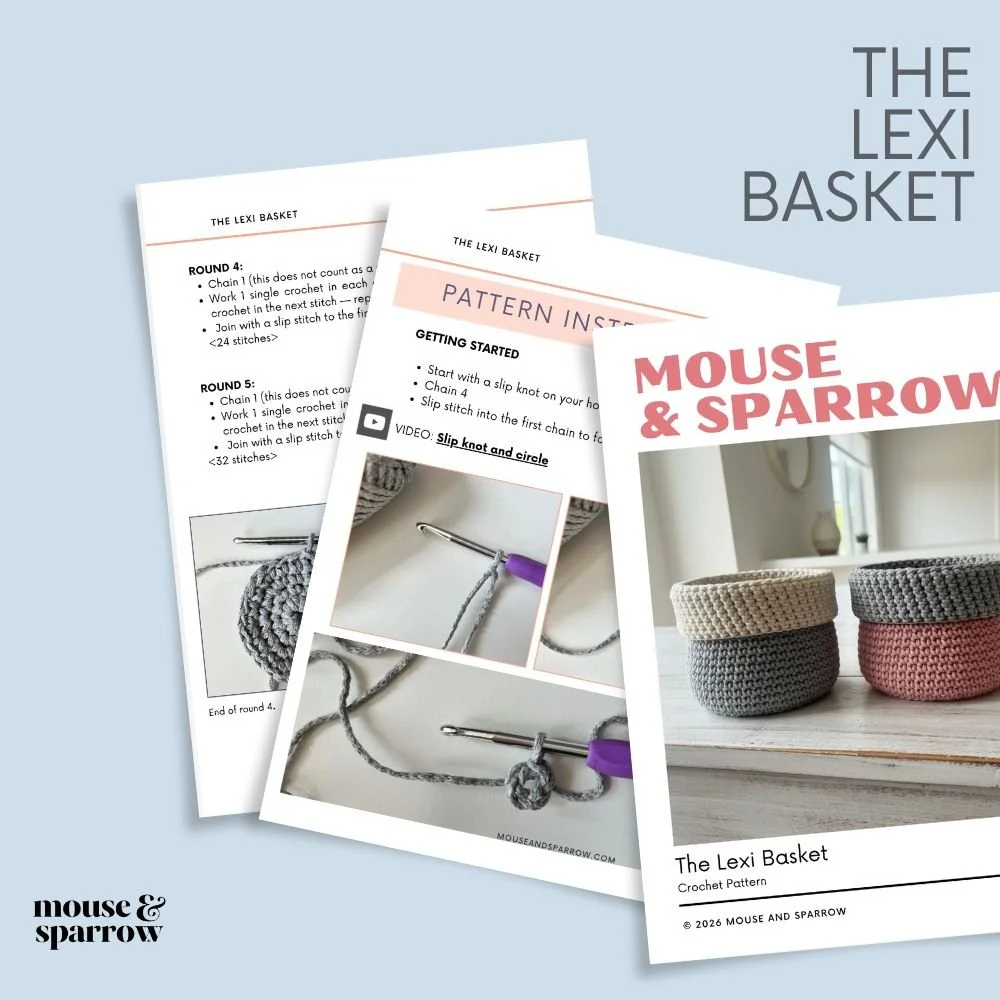
Print this Pattern
Need a portable, printable version? You’ll love the premium PDF! This instant download is beautifully formatted for easy printing and includes the full pattern, step-by-step photo tutorials, and everything you need to crochet with confidence.
THE PATTERN
Getting Started
➤Basket Base
Start with a slip knot on your hook.
Chain 4.
Slip stitch into the first chain to form a circle.
Round 1
Work 8 single crochet into the circle.
Join with a slip stitch to the first single crochet.
<8 stitches>
Round 2
Chain 1 (does not count as a stitch)
Work 1 single crochet, then 2 single crochet in the next stitch — repeat around.
Join with a slip stitch to the first single crochet.
<12 stitches>
Round 3
Chain 1 (does not count as a stitch)
Work 1 single crochet, then 2 single crochet in the next stitch — repeat around.
Join with a slip stitch to the first single crochet.
<18 stitches>
Round 4
Chain 1 (does not count as a stitch)
Work 1 single crochet in each of the next 2 stitches, then 2 single crochet in the next stitch — repeat around.
Join with a slip stitch to the first single crochet.
<24 stitches>
Round 5
Chain 1 (does not count as a stitch)
Work 1 single crochet in each of the next 2 stitches, then 2 single crochet in the next stitch — repeat around.
Join with a slip stitch to the first single crochet.
<32 stitches>
Round 6
Chain 1 (does not count as a stitch)
Work 1 single crochet in each of the next 3 stitches, then 2 single crochet in the next stitch — repeat around.
Join with a slip stitch to the first single crochet.
<40 stitches>
Round 7
Chain 1 (does not count as a stitch)
Work 1 single crochet in each of the next 3 stitches, then 2 single crochet in the next stitch — repeat around.
Join with a slip stitch to the first single crochet.
<50 stitches>
Enjoying this pattern? Get the printable version.
Rounding the base is the trickiest part — and this is exactly where a clean, printed reference makes all the difference. No scrolling, no losing your place, no squinting at a screen.
The PDF includes:
✔ The full pattern in a clean, print-ready layout
✔ Step-by-step photos for the BLO round and colour change
✔ US + UK terms side by side
✔ A stitch guide you can keep open beside you
Round 8
Chain 1 (does not count as a stitch)
Work 1 single crochet in the back loop only of each stitch around.
Join with a slip stitch to the first single crochet.
<50 stitches>
➤ Basket Sides
Rounds 9–17
Chain 1 (does not count as a stitch)
Work 1 single crochet in each stitch around.
Join with a slip stitch to the first single crochet.
<50 stitches>
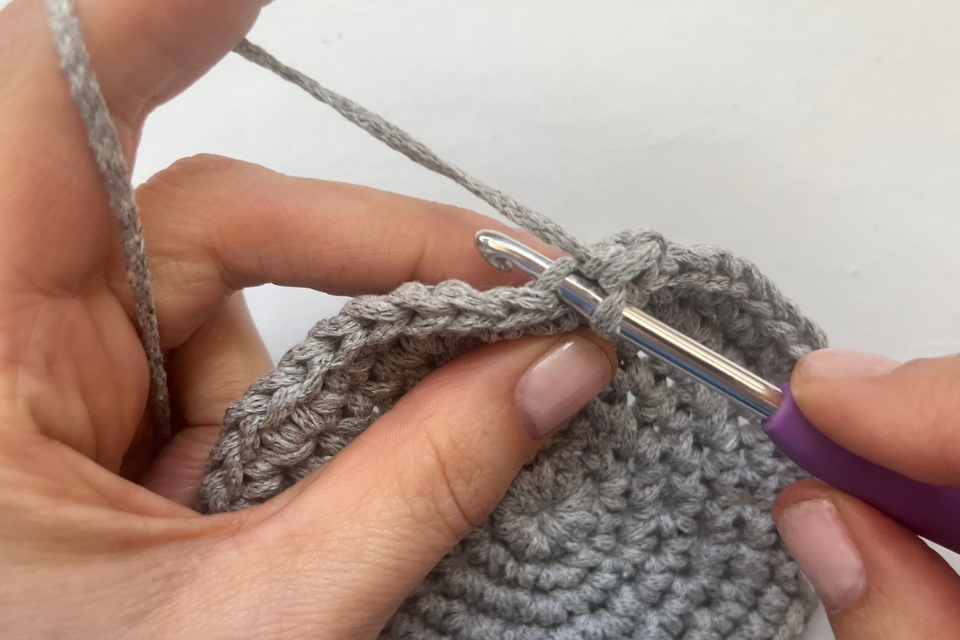
➤Colour Change
At the end of Round 17, change to your complementary colour by completing the slip stitch with the new yarn.
Continue the next round in the new colour.
Rounds 18–24
Chain 1 (does not count as a stitch)
Work 1 single crochet in each stitch around.
Join with a slip stitch to the first single crochet.
<50 stitches>
Cut yarn and weave in the ends.
Fold over the last seven rounds to complete the basket.
TROUBLESHOOTING
Why is my basket floppy?
Your stitches may be too loose. Try using a smaller hook or tightening your tension.
Why is my base curling?
You may not have enough increases — check your stitch count.
Why is my base wavy?
Too many increases or loose tension can cause this.
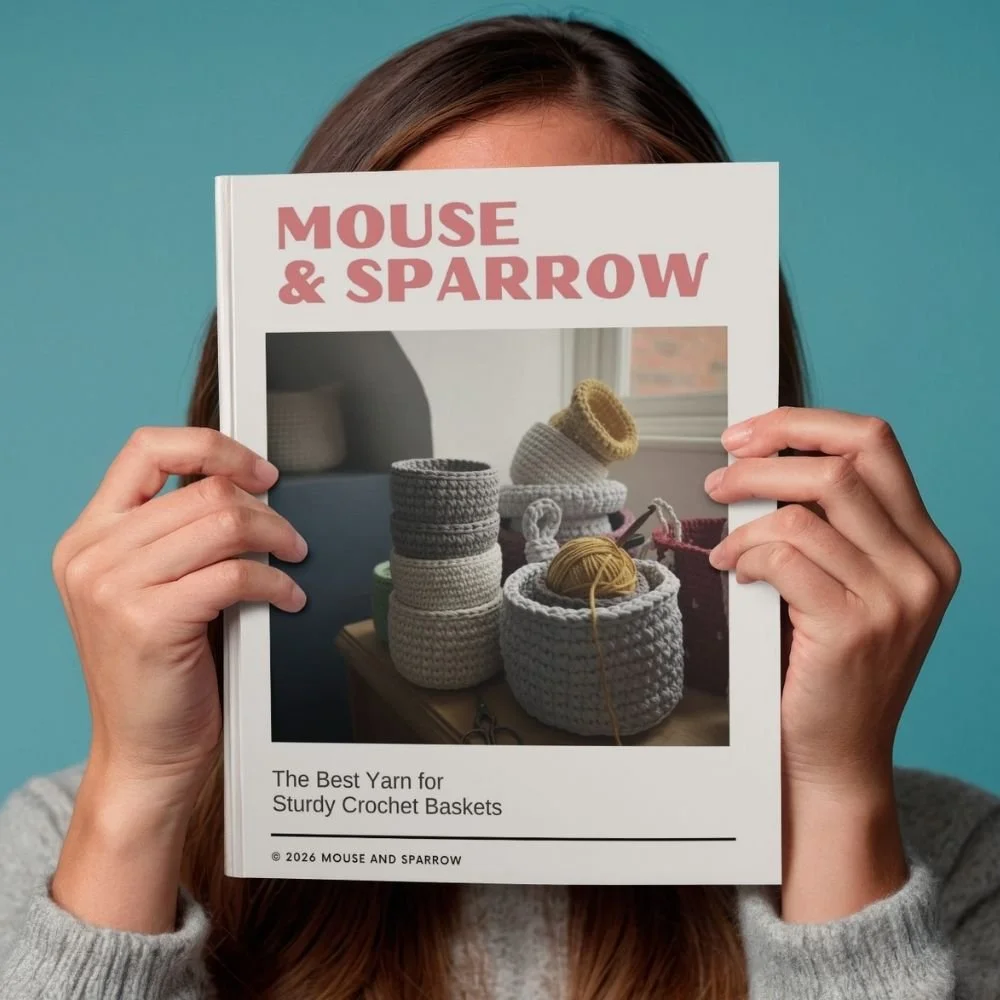
Not sure which yarn to use for your first basket? 👇
The wrong yarn can turn a beginner basket floppy fast. This free guide will help you choose yarns that actually hold shape — so your basket looks better from the start.
✔ The best yarns for beginner crochet baskets
✔ Common mistakes that ruin basket structure
✔ A simple guide to choosing the right yarn
More Easy Crochet Projects You’ll Actually Use
Buying yarn for your crochet basket? Best Yarn for Crochet Baskets
Looking for more quick crochet projects? 3 Easy Crochet Projects You Can Finish This Weekend
Worried about getting stuck? 10 Crochet Mistakes Beginners Make (and How to Fix Them)
Short on time? Too Busy to Crochet? How to Start Even If You Only Have 15 Minutes
Learn a new skill: How to Join Granny Squares: 3 Easy Methods I Use
Love practical makes? How to Crochet a Laptop Case You Will Love to Make and Use Daily
Make Something You’ll Actually Use
There’s something satisfying about finishing a crochet project.
This simple basket is the kind of project that gives you that quick win. It’s practical, beginner-friendly, and something you’ll actually use around your home long after the last stitch.
So grab your yarn, take it one round at a time, and enjoy creating something beautiful and useful.
What’s Next?
📌 Pin this post: Save this tutorial to your Pinterest boards so you can easily come back to it later.
💬 Leave a comment: We love hearing your feedback. Tell me in the comments below—how did this basket go for you?
✨ Get the Crochet Pattern Customization Kit: This download it full of tips, techniques and cheat sheets to help you make each project uniquely yours. Get it here.
🧶Show Off Your Creation! 🧶
Finished your weekend basket? I’d love to see it! Share a photo on Instagram or Pinterest
More inspiring posts

Looking for a thoughtful housewarming gift? These 10 practical crochet projects are beautiful, useful, and beginner-friendly. From modern placemats and storage baskets to cosy cushions and plant pot covers, discover crochet home décor ideas that new homeowners will actually use and love.