
How to Crochet a Beautiful Basket Using Only Simple Stitches
This post contains affiliate links.
If you've been saving crochet patterns for months without actually starting one — this basket was made for you.
Maybe you've told yourself you'll start when you have a quiet evening, better yarn, more confidence.
Maybe you've watched other people's finished projects and thought: I'd love that, but I'm not sure I'm quite there yet.
This basket uses only a few basic stitches and simple colour changes — and it's designed to be finished in a single evening.
Not someday. Tonight, if you want.
The free pattern is below, or grab the printable PDF here if you'd rather crochet without a screen.

Why This Crochet Basket Is Beginner-Friendly
This crochet basket pattern keeps things simple.
You only use a few basic techniques: chain stitch, single crochet, and simple colour changes.
Once the first few rounds are complete, the pattern settles into an easy rhythm that becomes surprisingly relaxing to crochet.
The basket is worked in one piece from the base upwards, with simple increases to create the bottom and straight rounds to build the sides.
Most makers can comfortably finish it in a single evening — especially with a cup of tea and something good on in the background.
What You'll Make
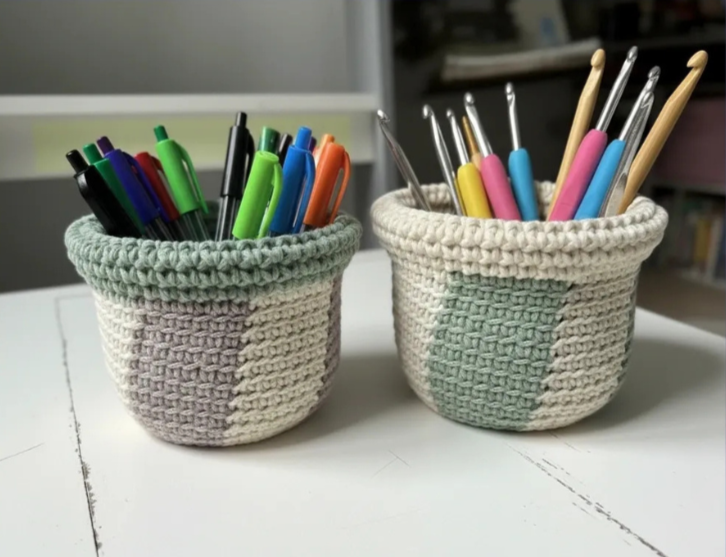
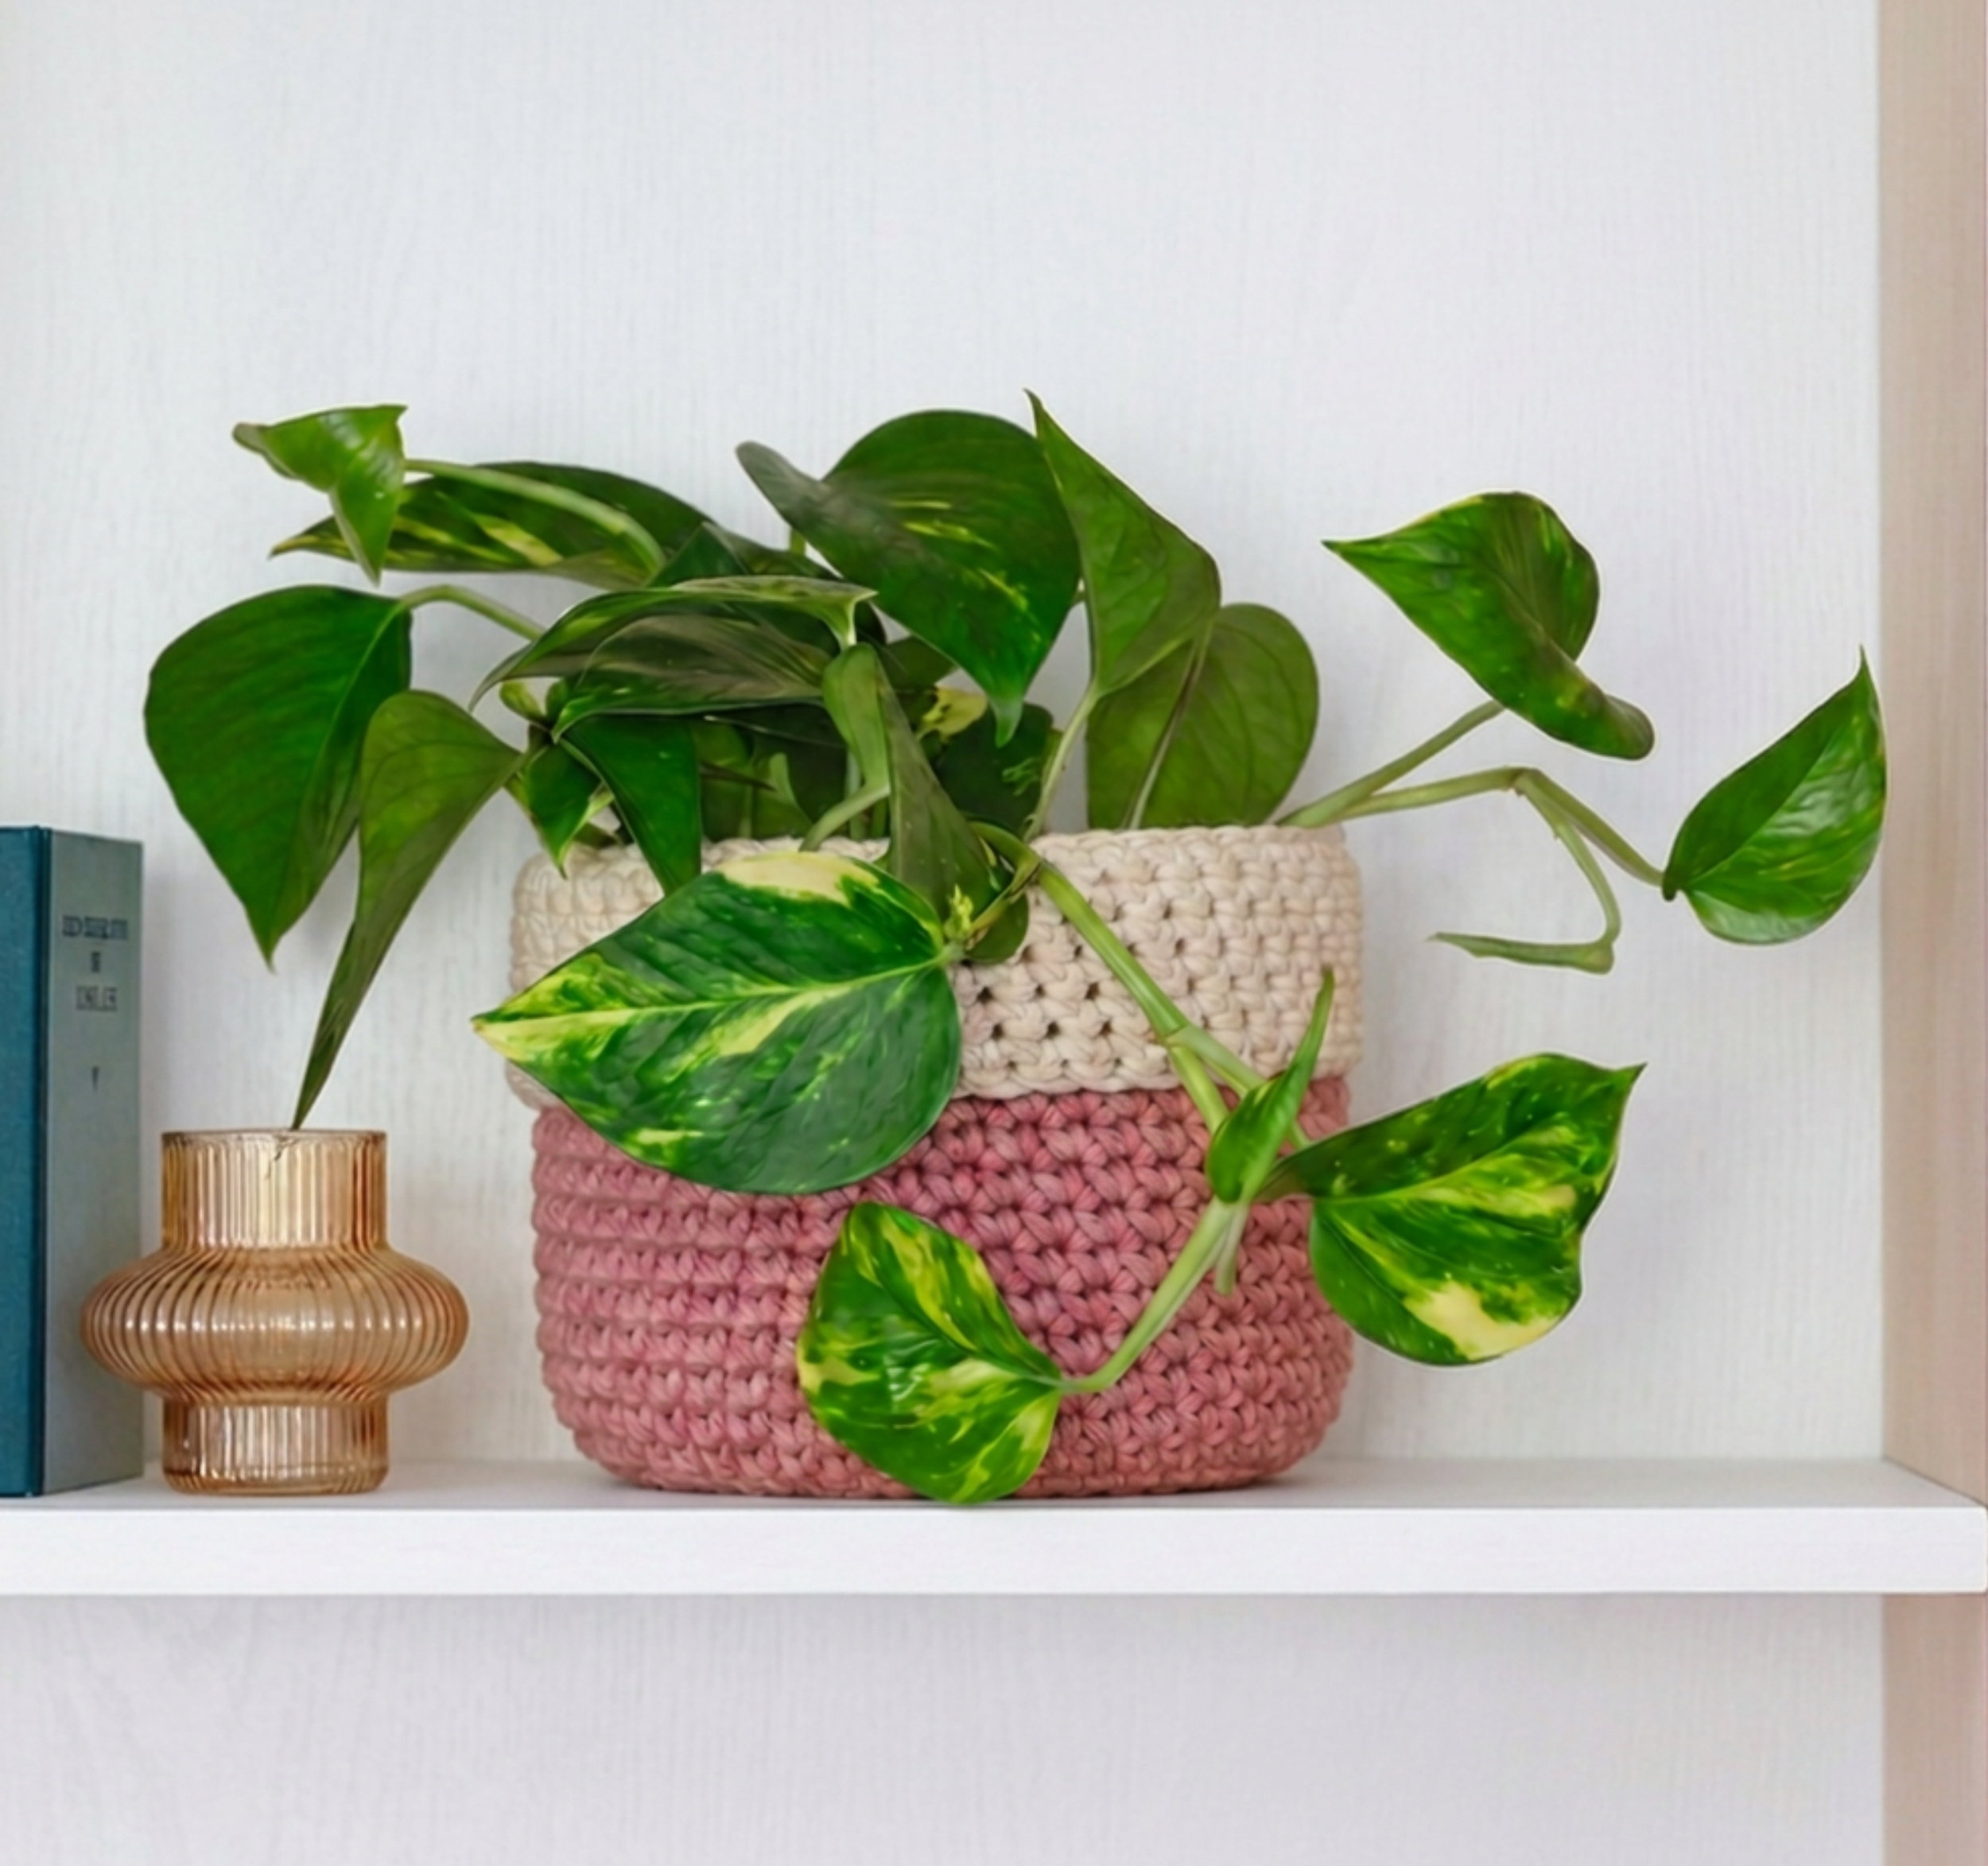
A small, striped rochet basket about 12 cm tall and 12 cm across — the perfect size for a bathroom shelf, a bedside table, or a kitchen drawer. Practical enough to use every day, pretty enough to leave out.
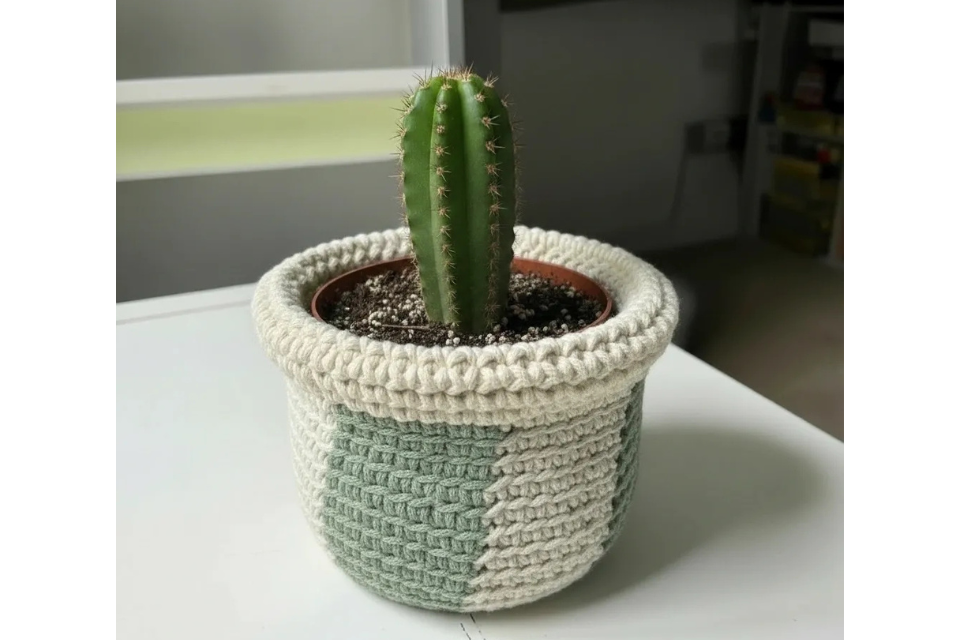
How to Crochet this Striped Basket
This basket is worked in continuous rounds using single crochet (worked in the back loop) and a simple two-colour crochet technique.
The basket starts at the base and is worked upwards in one piece.
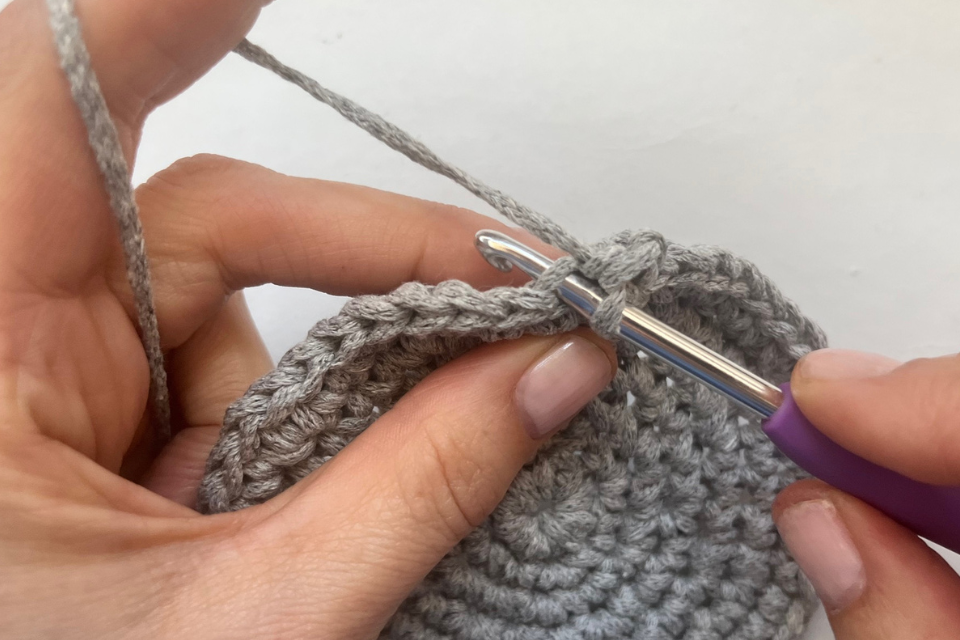
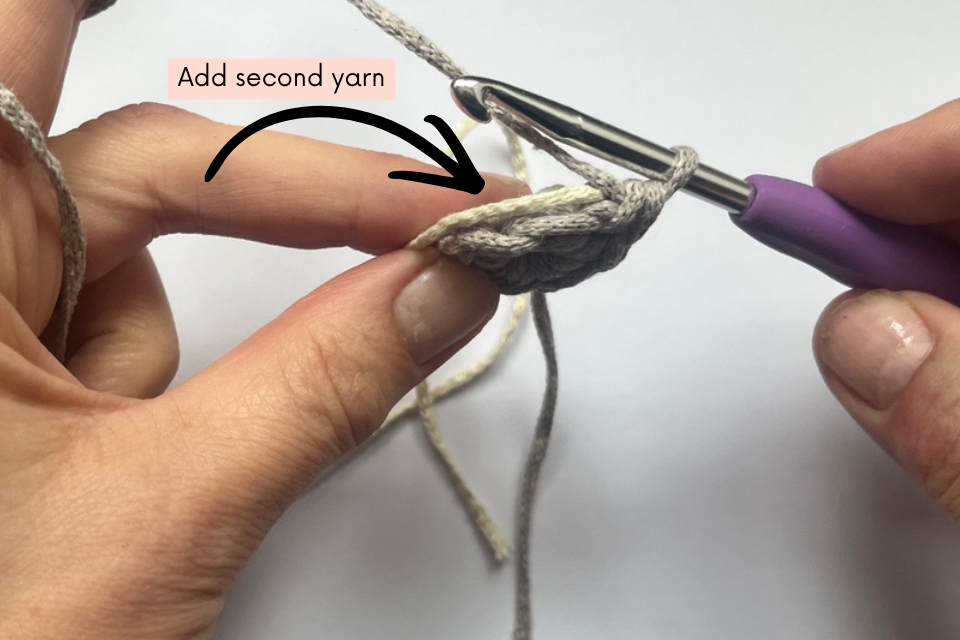
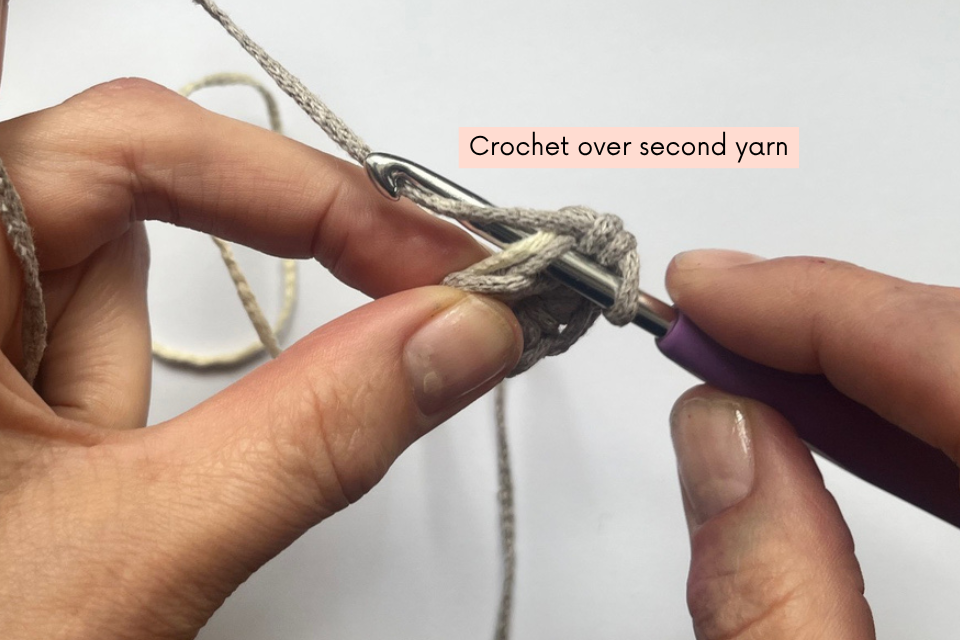
You’ll begin with the yarn A, then start carrying yarn B inside the stitches from Round 2 onwards. The unused yarn is crocheted over and hidden inside your stitches as you work.
When changing colours finish the final yarn over of the last stitch with the new colour. This creates a much cleaner colour transition.
For example:
Start the stitch with yarn A
Before completing the final yarn over, pick up yarn B
Pull yarn B through to complete the stitch
Continue working with yarn B
You may find it helpful to place a stitch marker in the first stitch of each round and move it up as you work, especially when working in continuous rounds.
To finish, the top section is folded down inside the basket to create the final shape and contrast border.
If you're completely new to crochet, take a quick look at:
How to do a single crochet before you start — it's the only stitch this pattern uses.
What You Need
Yarn:
My go-to for this basket: DMC Eco Vita Recycled Cotton (120g x2 Grey and Natural)— it gives the basket its structure right from the start
Any worsted weight cotton yarn works well
Avoid anything too fluffy or stretchy — you want a firm, smooth yarn
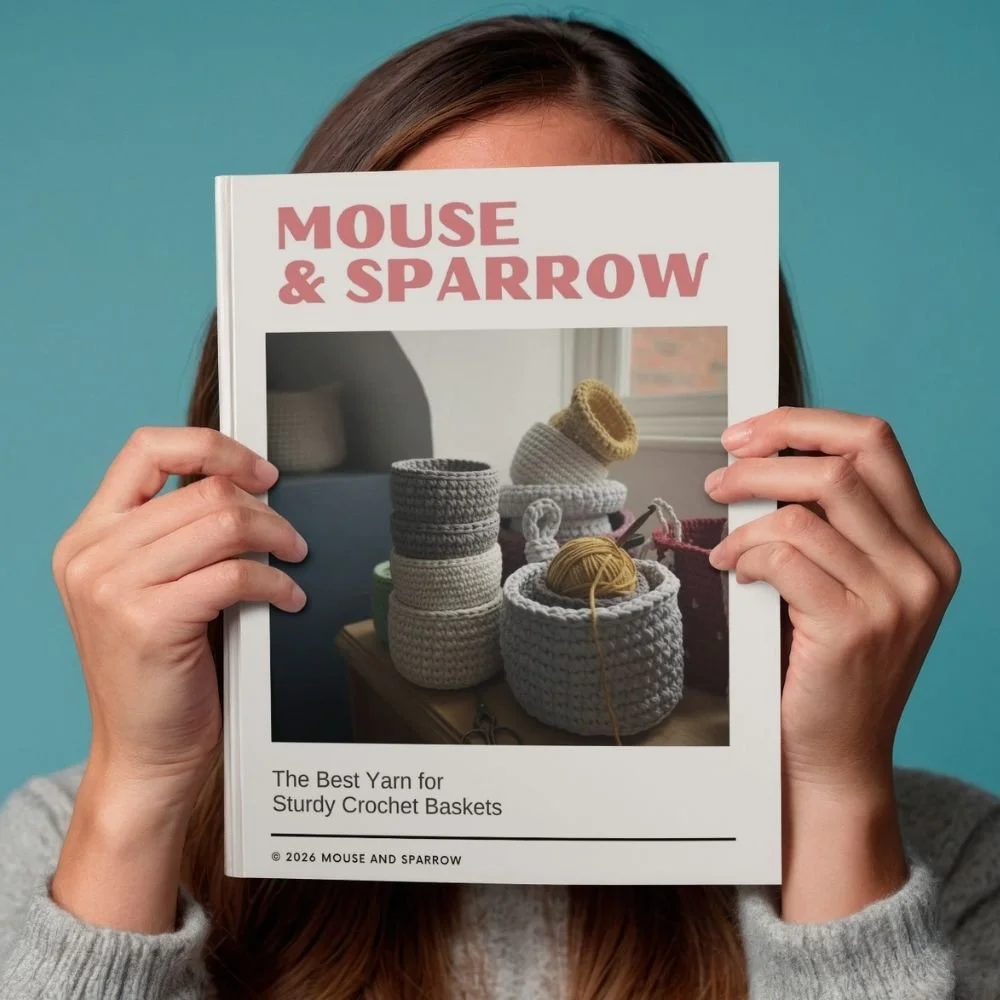
👉 Want help choosing the best yarn for sturdy crochet baskets?
Check out my free yarn guide with more yarn recommendations and beginner-friendly options.
Tools:
Want to Try Different Yarn for Your Basket? 🧶
Not all yarn creates the same result.
Some yarns make beautiful, sturdy baskets — while others turn soft, floppy, or stretchy.
Download my free guide to discover:
The best yarn alternatives for crochet baskets
👉 Get the free Basket Yarn Guide and find the perfect yarn for your next project.
Skill Level + Details
Skill: Beginner
Time: 3–5 hours
Finished size: Approx. Height: 12 cm / 4.72" Diameter: 12 cm / 4.72"
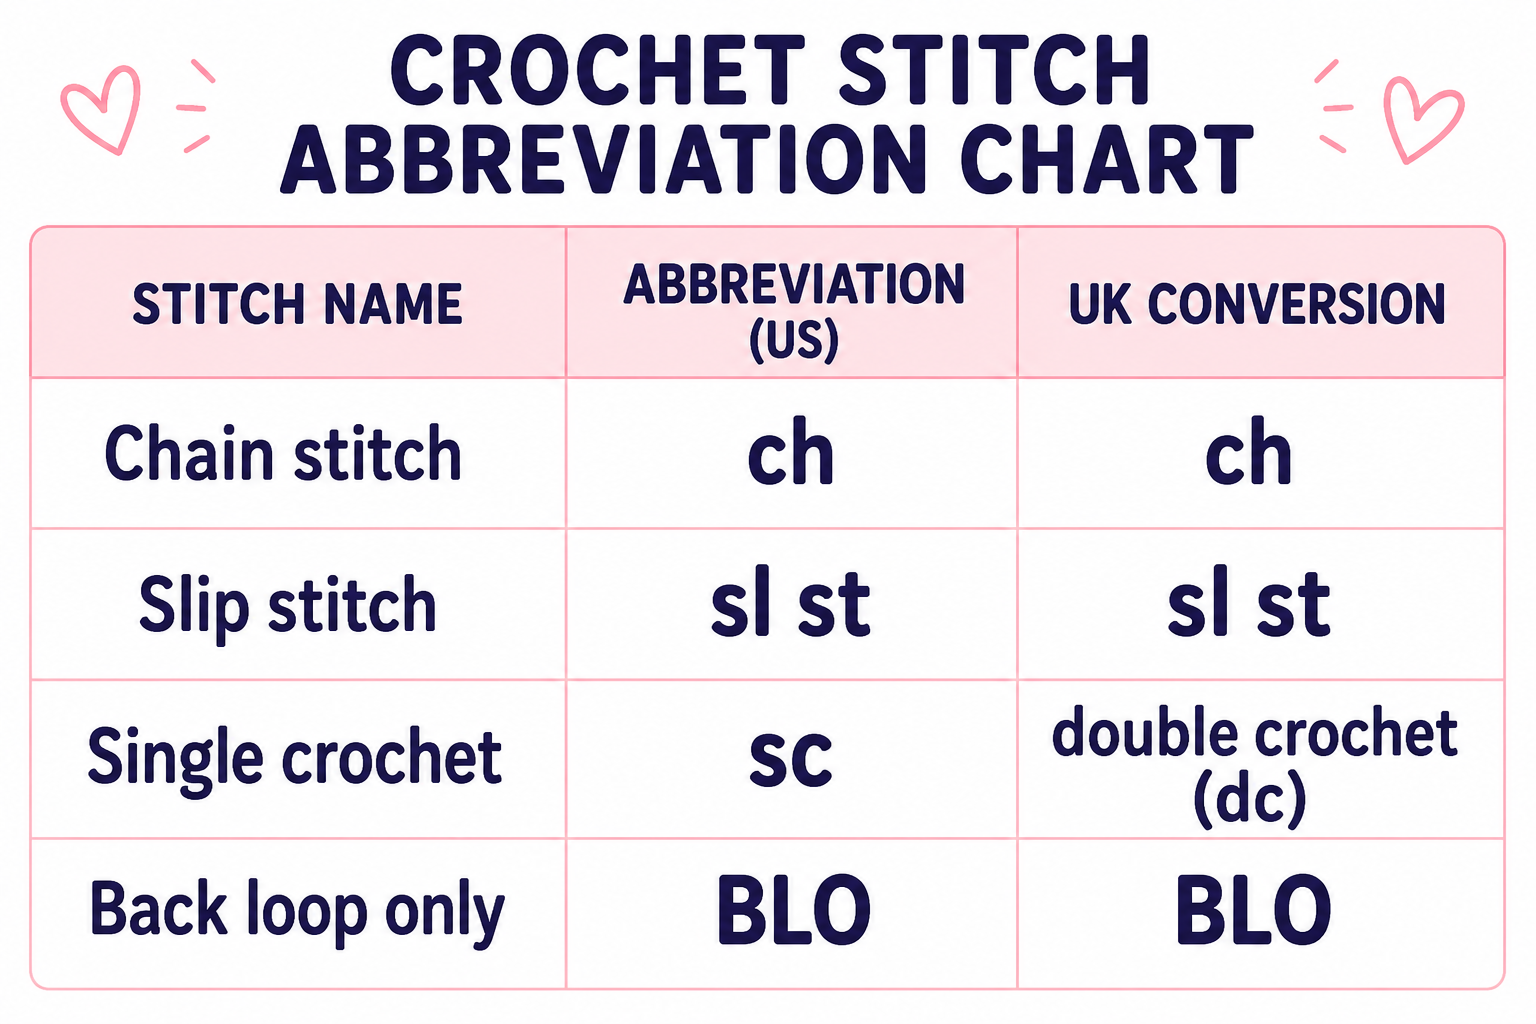
Terms: US crochet terms (the paid version includes a US and UK version of the pattern)
Before You Start
A few things that make a big difference:
Keep your stitches tight — this is what gives the basket its structure
Use a stitch marker to track the start of each round (don't skip this)
Stitches Used
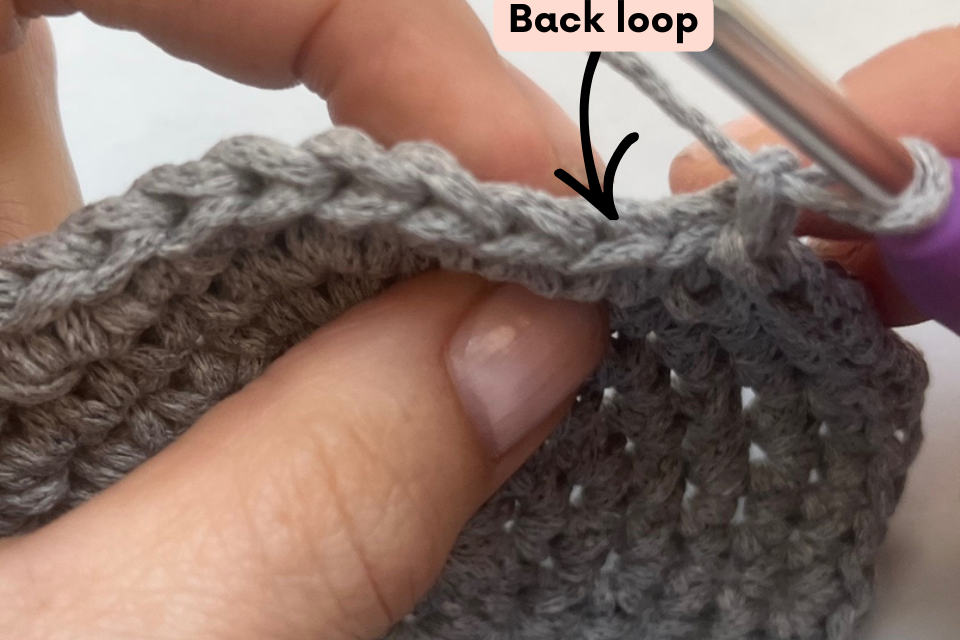
Back Loop Only (BLO): Insert your hook into the back loop only — the loop furthest from you — instead of under both loops. This creates a clean ridge that defines where the base meets the sides. It sounds fiddly but you'll feel it click into place immediately.
The Pattern
Getting Started
➤Basket Base
Start with a slip knot on your hook.
Chain 4.
Slip stitch into the first chain to form a circle.
Round 1
Work 8 single crochet into the circle.
<8 stitches>
Round 2
Carry yarn B along the back of your work as you crochet.
Work 2 single crochet BLO in each stitch around.
Work the colour changes as follows:
Work 2 single crochet BLO with yarn A
Change to yarn B in the last yarn over
Work 2 single crochet BLO with yarn B
Change to yarn A in the last yarn over
Repeat around.
<16 stitches>
Round 3
Work 1 single crochet BLO, then work 2 single crochet BLO into the next stitch around.
Work the colour changes as follows:
Work 3 single crochet BLO with yarn A
Change to yarn B in the last yarn over
Work 3 single crochet BLO with yarn B
Change to yarn A in the last yarn over
Repeat around.
<24 stitches>
Round 4
Work 2 single crochet BLO, then work 2 single crochet BLO into the next stitch around.
Work the colour changes as follows:
Work 4 single crochet BLO with yarn A
Change to yarn B in the last yarn over
Work 4 single crochet BLO with yarn B
Change to yarn A in the last yarn over
Repeat around.
<32 stitches>
Round 5
Work 3 single crochet, then work 2 single crochet BLO into the next stitch around.
Work the colour changes as follows:
Work 5 single crochet BLO with yarn A
Change to yarn B in the last yarn over
Work 5 single crochet BLO with yarn B
Change to yarn A in the last yarn over
Repeat around.
<40 stitches>
Round 6
Work 4 single crochet BLO, then work 2 single crochet BLO into the next stitch around.
Work the colour changes as follows:
Work 6 single crochet BLO with yarn A
Change to yarn B in the last yarn over
Work 6 single crochet BLO with yarn B
Change to yarn A in the last yarn over
Repeat around.
<48 stitches>
Round 7
Work 5 single crochet BLO, then work 2 single crochet BLO into the next stitch around.
Work the colour changes as follows:
Work 7 single crochet BLO with yarn A
Change to yarn B in the last yarn over
Work 7 single crochet BLO with yarn B
Change to yarn A in the last yarn over
Repeat around.
<56 stitches>
➤ Basket Sides
Round 8 - 17
Work 1 single crochet BLO in each stitch around in continuous rounds.
Continue the colour pattern as follows:
Work 7 single crochet BLO with yarn A
Change to yarn B in the last yarn over
Work 7 single crochet BLO with yarn B
Change to yarn A in the last yarn over
Repeat around until the end of Round 11.
<56 stitches>
Enjoying this pattern?
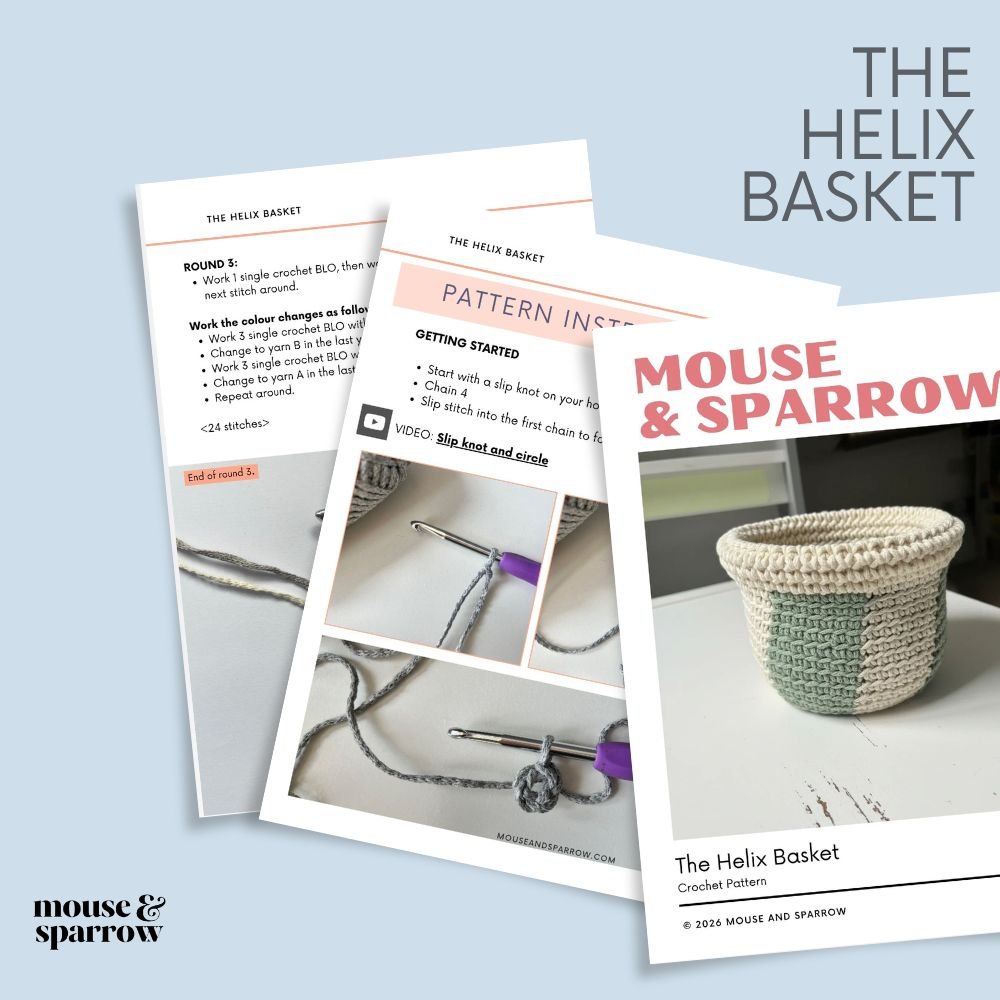
Get the printable version.
Rounding the base is the trickiest part — and this is exactly where a clean, printed reference makes all the difference. No scrolling, no losing your place, no squinting at a screen.
The PDF includes:
✔ The full pattern in a clean, print-ready layout
✔ Step-by-step photos
✔ US + UK terms side by side
✔ A stitch guide you can keep open beside you
Rounds 18 - 35
Work 1 single crochet in each stitch around in continuous rounds.
Optional: Change colours every 7 rounds
<56 stitches>
Cut the yarn and weave in the ends.
Fold the last 7 rounds inside the basket to complete the basket.
TROUBLESHOOTING
Floppy sides? Your tension is too loose. Try a smaller hook or pull your stitches a little tighter — even a small change makes a real difference
Base curling up? Check your stitch count. A missed increase in the early rounds tends to cause this.
Base going wavy? Too many stitches, or tension that's varying. Slow down and count each round before you join.
You Made That
There's a moment, usually somewhere around Round 12, where it starts to look like an actual basket.
That's the moment people in my workshops always look up and say "oh — I'm doing it."
That moment is waiting for you tonight.
Grab your yarn, set a timer if it helps, and take it one round at a time.
By the time you're weaving in your ends, you'll have something real — something you made, something you can use, something you can keep.
What’s Next?
📌 Save it to Pinterest so you can find it again easily
💬 Leave a comment below — I'd love to know how your evening went.
Grab the printable PDF if you want to crochet without squinting at a screen.
Not sure which yarn to use for your first basket? - Download this free guide
Show Off Your Creation! 🧶
Finished your weekend basket? I’d love to see it! Share a photo on Instagram or Pinterest
More inspiring posts

Bring your Halloween decorating to life with this easy crochet bat pattern. Learn how to crochet bats with clear instructions, step-by-step photos, and beginner-friendly guidance. These small seasonal decorations are quick to make, fun to display, and perfect for adding a unique touch to your autumn home. Discover how a simple crochet project can become a Halloween favourite you'll bring out year after year.